Help & Support 02 9161 8036
Welcome Guest

Recipes | Viewing Category: Breakfast

Steamed Taro Buns

Posted on 01 May, 2024
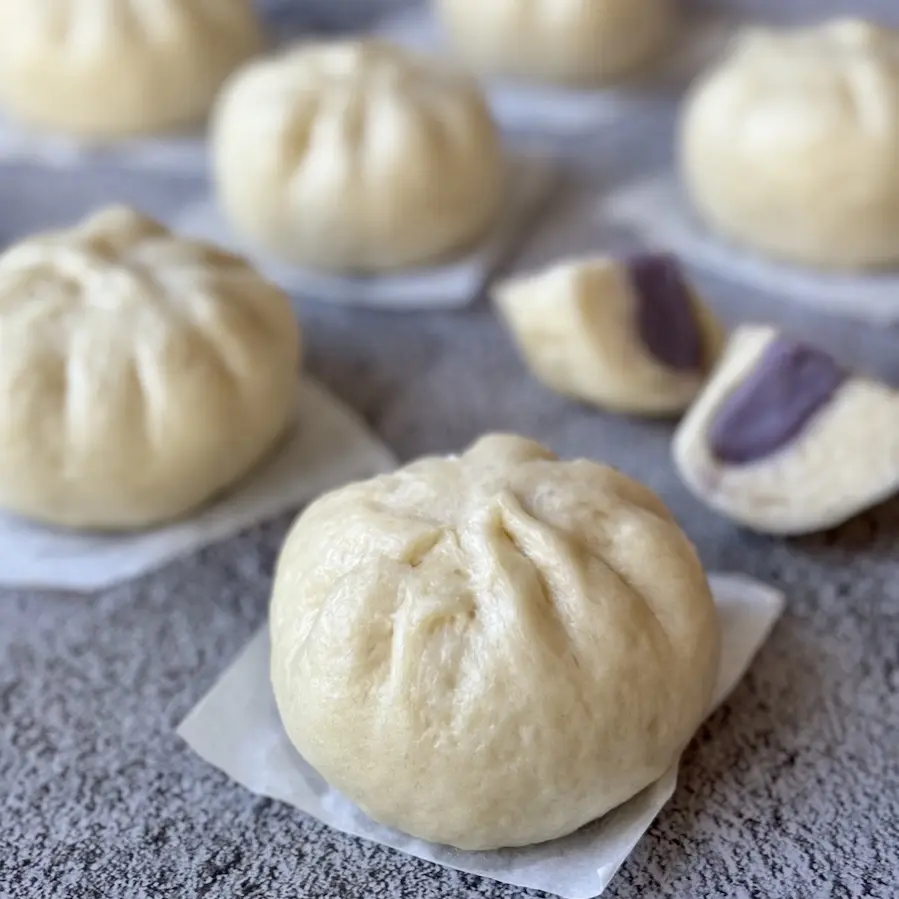
Steamed Taro Buns

Makes 12 large buns

For the Taro Paste Filling

  1. Cut taro halves in half then slice into 5mm thick slices.
  2. Place taro into a large steamer basket then steam over rapidly boiling water for 30mins or until cooked.
  3. Add cooked taro into a food processor, along with coconut milk/cream, sugar and a drop of ube flavouring. Blitz until smooth.
  4. Transfer taro puree to a large non-stick pan.
  5. Cook taro puree on medium heat. Steam will be released as the water evaporates from the puree. Keeping moving the puree around in the pan with a spatula to prevent any dark spots from forming. Continue doing this until your puree turns into a paste.
  6. Take off the heat and allow to cool completely. You can make the paste ahead of time and chill in the fridge. The paste will set further on cooling.

For the Buns

  1. Add sugar, yeast and water to a bowl and mix. Leave for 10mins.
  2. Add flour to the bowl of a stand mixer. Make a well in the centre and pour in the yeast mixture. Mix on speed 1 for 10mins. If you don’t have a stand mixer, knead with your hands until the dough is smooth.
  3. Form the dough into a ball and place in an oiled bowl and cover with cling film. Set aside for 90mins.
  4. Mix baking powder and water together in a small bowl. Set aside.
  5. After 90min, transfer your dough to a work surface. Roll out into a large rectangle. Pour baking powder mix onto the dough. Fold the dough over the liquid and gently knead until the dough feels smooth (about 2 mins). Divide your dough into 12 equal parts. Form into balls then cover with cling film and allow to rest for 10mins.
  6. Divide your prepared taro paste into 12 equal parts and form into balls.
  7. Roll out your ball of dough and place a ball of filling in the centre. Gather the dough around the taro filling and pinch together to seal at the top. Place on a square of baking paper and into a steamer basket. Repeat until all 12 buns are made.
  8. Add a splash of vinegar into a pot of water and bring to the boil. Lightly mist your buns with water (optional) then steam for 10mins. After 10mins, turn off the heat but DO NOT OPEN THE LID. Leave steamer undisturbed for 3mins before opening the lid.


Serve hot.


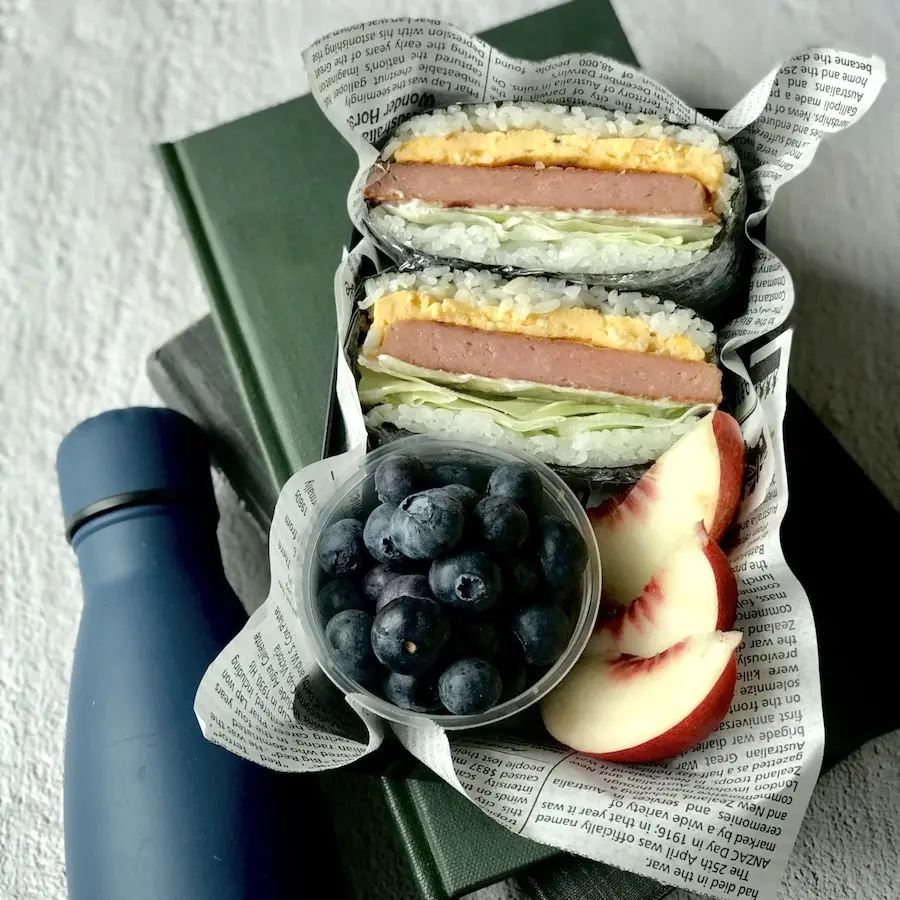
Spam Onigirazu

Posted on 15 Feb, 2024
Spam Onigirazu

Makes 6


1. Wash and cook your rice.

2. While your rice is cooking, prepare the filling:

  • Slice SPAM into 6 thick slices. Heat up a large skillet with 1tsp oil. Add SPAM slices and pan fry until each side is golden. Drain on kitchen paper and set aside.
  • Crack eggs into a bowl and add a dash of milk/water. Season with salt and pepper and whisk well to combine. Heat up a non-stick skillet with 1tsp oil. Pour in egg mix and make one omelette. Slide omelette onto a chopping board and slice into 6 portions.

3. Once cooked, transfer the rice to a large bowl and mix in sushi seasoning to taste. Divide the rice mix into 12 portions.


To make each onigirazu:

  1. Place a large sheet of cling film down on your bench.
  2. Place one sheet of nori on top of your piece of plastic.
  3. Place one portion of seasoned rice in the centre of the nori. Flatten it down to make a small square, rotated 45 degrees to the direction of your piece of nori. The rice acts like the bread in a sandwich.
  4. Add a piece of omelette on the centre of your rice.
  5. Add a piece of SPAM on the centre of your omelette.
  6. Squeeze on Kewpie mayo to taste.
  7. Tear up ½ a lettuce leaf to fit your rice square and layer on top of the mayo.
  8. Grab another portion of seasoned rice and compact it in your hand before placing on top of the lettuce.
  9. Fold each corner of nori over your ‘sushi sandwich’ to completely wrap your sandwich.
  10. Wrap the cling film around your nori parcel so that it stays firmly in shape.
  11. Allow your onigirazu to sit for 10 minutes to help set it before slicing in half.


Repeat with remaining ingredients to make the other 5 onigirazu.

Cold Soba Noodles

Posted on 03 Jan, 2024
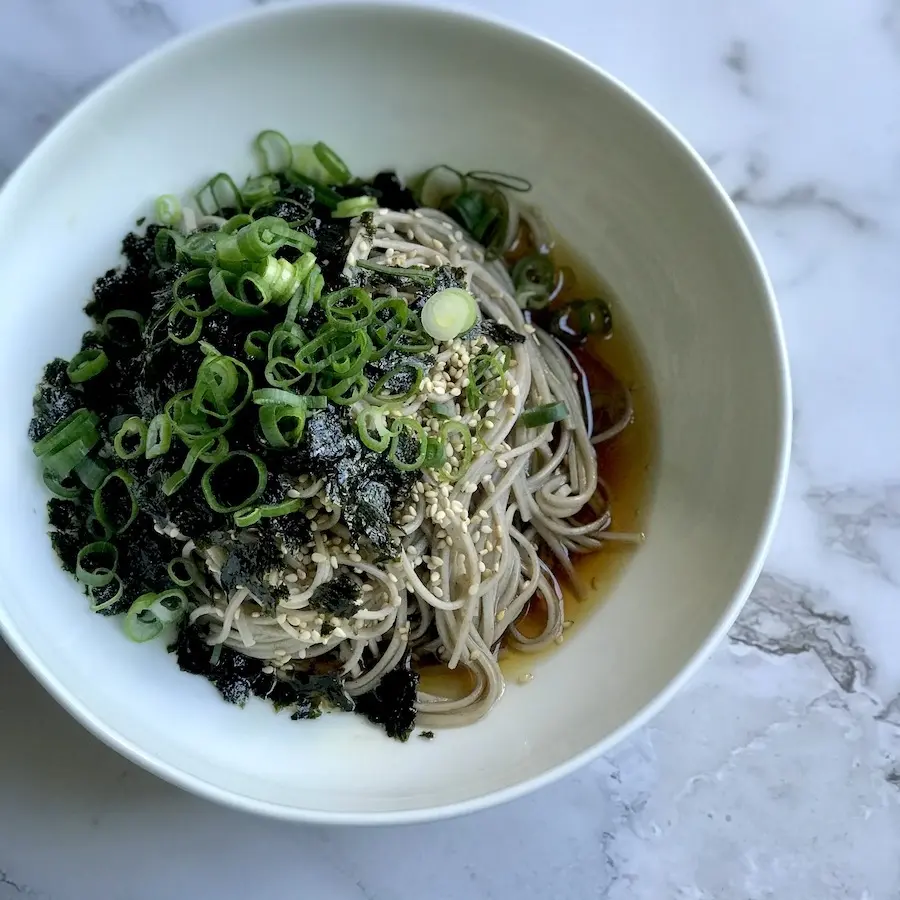
Cold Soba Noodles

1. Cook soba noodles according to packet

2. In a serving bowl add kombu tsuyu (a soy based seasoning liquid with a seaweed dashi base) and quality sesame oil into your serving bowl and mix. Pile on a bundle of cooked soba noodles (make sure they’re well rinsed and drained) then top with toasted sesame seeds, crushed seasoned seaweed sheets and a generous helping of sliced spring onions. 


p.s. You can always add a side of protein or veg to your noodles (we sometimes pair it with assorted vegetable tempura but kept it simple this time). 
 

Jian Bing

Posted on 08 Aug, 2023
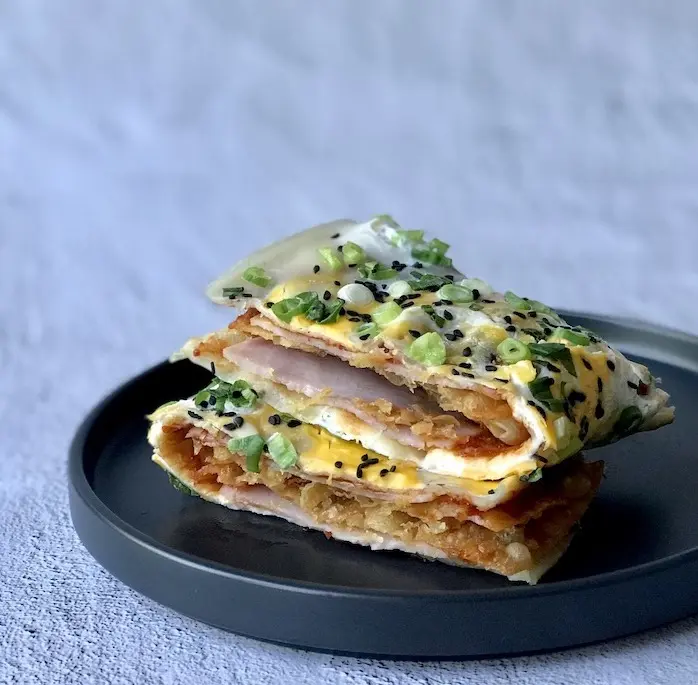
Jian Bing

1. Place all dry crepe ingredients into a med sized bowl. Whisk. Add in water and whisk to form a batter. A few lumps are ok. Add in oil and whisk to just combine.

2. Heat a non-stick pan and spoon in a ladle of batter, or just enough to coat the pan with a thin layer of batter. Keep the heat on low.

3. When the batter just turns opaque, crack an egg onto the crepe. Using a spoon, spread the egg to cover the crepe.

4. Sprinkle on spring onions and sesame seeds.

5. Flip the crepe over. Dollop on <1T hoisin sauce and <1T sambal oelek. Smear to cover the crepe with this sauce mix.

6. Place 2 slices of ham of choice down the centre of the crepe, leaving a gap in the middle to allow for a fold.

7. Place a crispy wonton wrapper on each piece of ham.

8. Fold one edge of the crepe in to cover. Fold the opposite parallel edge of the crepe in to cover. Now fold the crepe in half, along the gap you created between your ham/wonton wrappers.


9. Remove the crepe from the pan and slice in half. Enjoy 

Steamed Eggs

Posted on 08 Aug, 2023
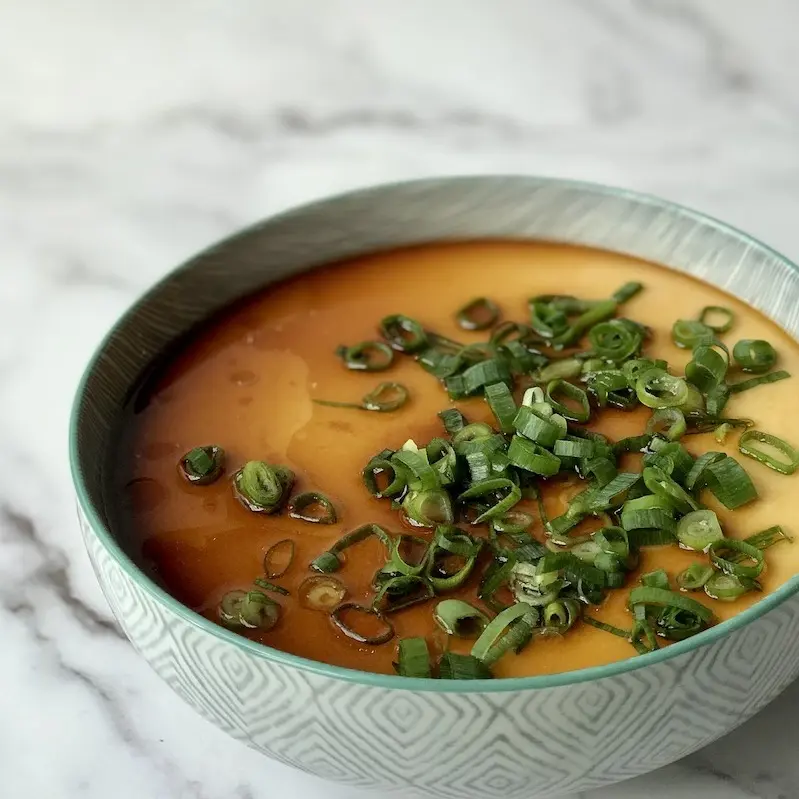
Steamed Eggs

Serves 4-6 as part of a shared meal

1. Whisk eggs in a jug. Add water, fish sauce and chicken bouillon and whisk just enough to combine. Pass the mixture through a sieve into your steaming bowl for a silky smooth result. Use a spoon to remove any air bubbles on the surface of your egg mix.


2. Cover bowl with cling wrap and place inside steamer filled with water. Place the lid on the steamer and bring the water to the boil. Immediately drop the heat to low once the water starts to boil and let steam for 12-15mins. Times will vary depending on the size of your bowl. Deep bowls with thick walls will take longer. The centre should have a slight wobble and will further set upon cooling.


3. Carefully remove the bowl from the steamer. Discard the cling film and top with soy sauce, sesame oil and sliced spring onions. Enjoy immediately.

Almond Nectarine Slice

Posted on 18 Jul, 2023
Almond Nectarine Slice
  1. Preheat oven to 180C.
  2. Grease and line a 13cm x 33cm baking tray with baking paper.
  3. Using electric beaters or stand mixer, cream butter and sugar until light and fluffy.
  4. Beat in eggs one at a time. Add vanilla and beat through.
  5. Sift in flour and salt. Fold through with a spatula.
  6. Add almond meal and mix until well combined.
  7. Spoon mix into prepared pan and spread evenly. Stud with sliced nectarine and ¾ of the blueberries. Evenly scatter flaked almonds on top.
  8. Bake for 30-35mins until golden.
  9. Meanwhile, dissolve 2T caster sugar in 2T boiling water and set aside. When the slice comes out of the oven, brush the top of the slice and fruit with this sugar syrup for a glossy finish.
  10. Garnish with remaining fresh blueberries and lightly dust with icing sugar (optional).

Allow the slice to cool in the pan before cutting.

Lemongrass Pork Chops

Posted on 24 Jan, 2023
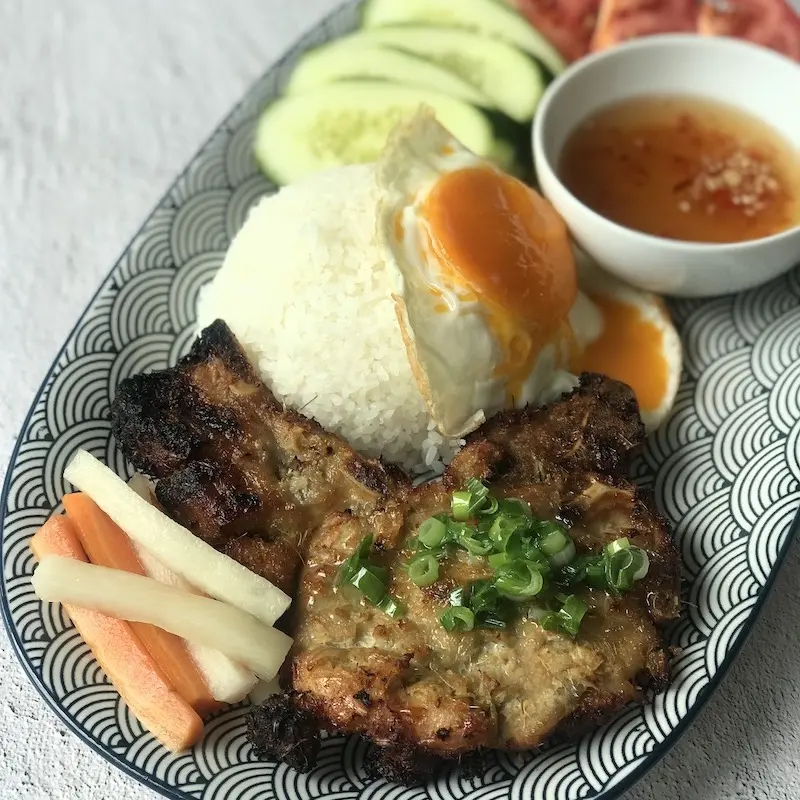
Lemongrass Pork Chops

Pork chops:

  1. Add the lemongrass, eschalot and garlic into a food processor. Pulverise everything into a fine straw and add to a large mixing bowl. (If you don’t have a powerful processor, you can finely slice rings from your lemongrass before chopping it into small pieces. Mince your garlic and finely dice your eshalot)
  2. Add the remaining marinade ingredients to the mixing bowl and stir to combine
  3. Tenderise pork chops by pounding each side with a meat mallet or the back of a knife. Cut 3-4 slits into the skin side of each chop and place into the marinade. Coat all sides of each pork chop with the marinade then cover and chill overnight.
  4. When ready to cook, spray pork chops with oil. Place chops flat, in a single layer in your AirFryer basket*. Air fry for 10 mins on 230C. Turn, then air fry for a further 10 mins**

Spring onion oil

  1. Place your spring onions to a heatproof bowl.
  2. Add oil to a small skillet and bring to smoking point.
  3. Pour the hot oil onto the onions. The onions will spit so be careful. Stir to mix and spoon them onto each pork chop

Enjoy as is or serve with broken rice and a fried egg (com tam) or even eat with rice vermicelli (bun) and salad. Don't forget the fish sauce! (nuoc cham)

* These can also be deep fried, or thrown onto the barbeque as well 

** Turn your chops again and air fry further if you like your chops dark.