Help & Support 02 9161 8036
Welcome Guest

Recipes: vegetarian

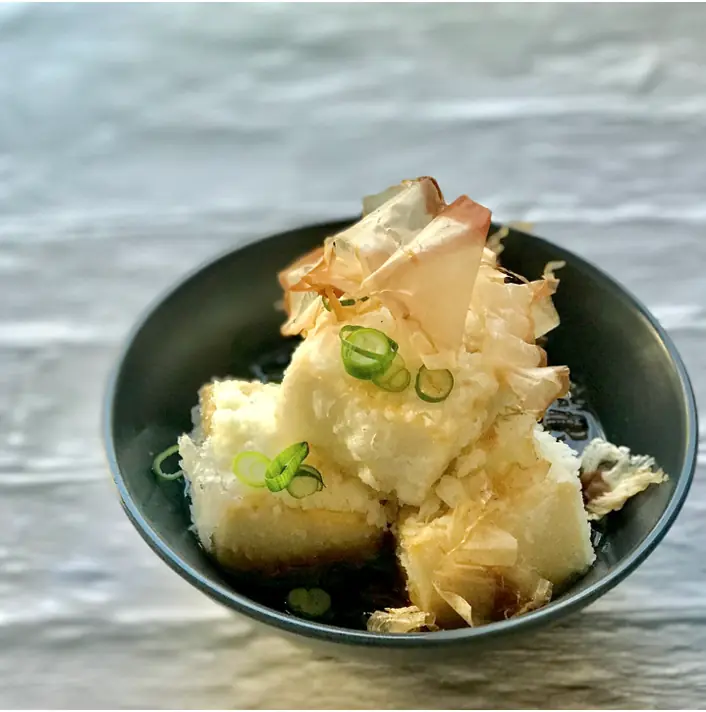
Agedashi Tofu

Posted on 24 Apr, 2024
Agedashi Tofu

Makes 6 cubes

1. Drain your tofu and wrap it a clean tea towel. Place between two plates. Place a couple of cans on top to draw out excess moisture from the tofu. Leave for 15mins.

2. Heat water and dashi powder in a small pot. Stir to dissolve the powder then add soy and mirin when the liquid starts to bubble. Turn off the heat and set aside.

3. Place oil in a med pot or wok. The depth of the oil needs to cover your tofu when you are deep frying it. Heat the oil on med-high heat.

4. Place potato starch in a medium sized bowl. When the oil is ready, remove the tofu from the tea towel. Coat a cube of tofu in the potato starch then deep fry until crispy. Do not overcrowd the pot as they may stick to each other. Coat and deep fry the cubes in batches. Remove and drain on a wire rack.

5. Place tofu in serving bowls. Gently pour the warm broth into the bowls around the bottom of the cubes.

6. Garnish with spring onions and katsuobushi.


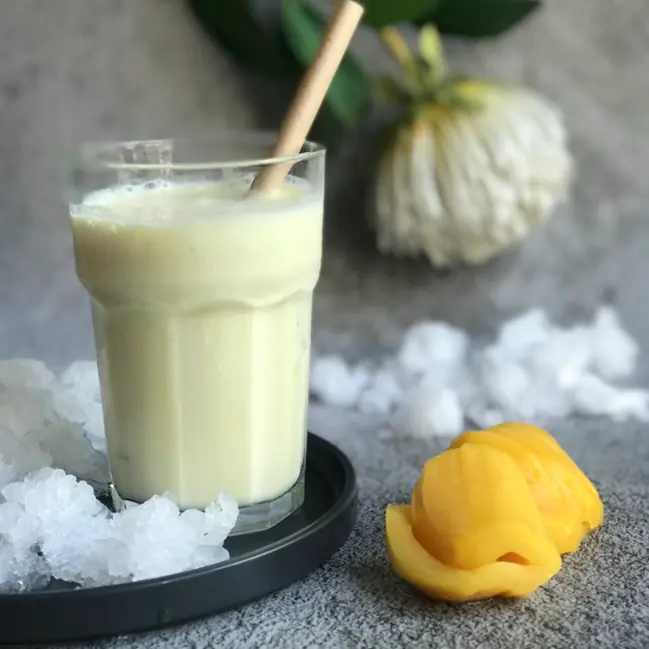
Sweet Corn Latte

Posted on 21 Feb, 2024
Sweet Corn Latte

Serves 2

  1. Add corn kernels and milk to a medium sized pot.
  2. Blitz with a blender then add in condensed milk. Stir to mix then heat the mix on medium-high heat.
  3. Drop the heat to low, just before the milk comes to the boil.
  4. Simmer for about 20-30 mins then strain the pulp through a fine mesh sieve
    (the longer you simmer the corn, the more pronounced the corn flavour will be)

Serve warm or allow to cool and pour into a tall glass filled with ice for a refreshing chilled option. Optional: Add a shot of cold brew or espresso

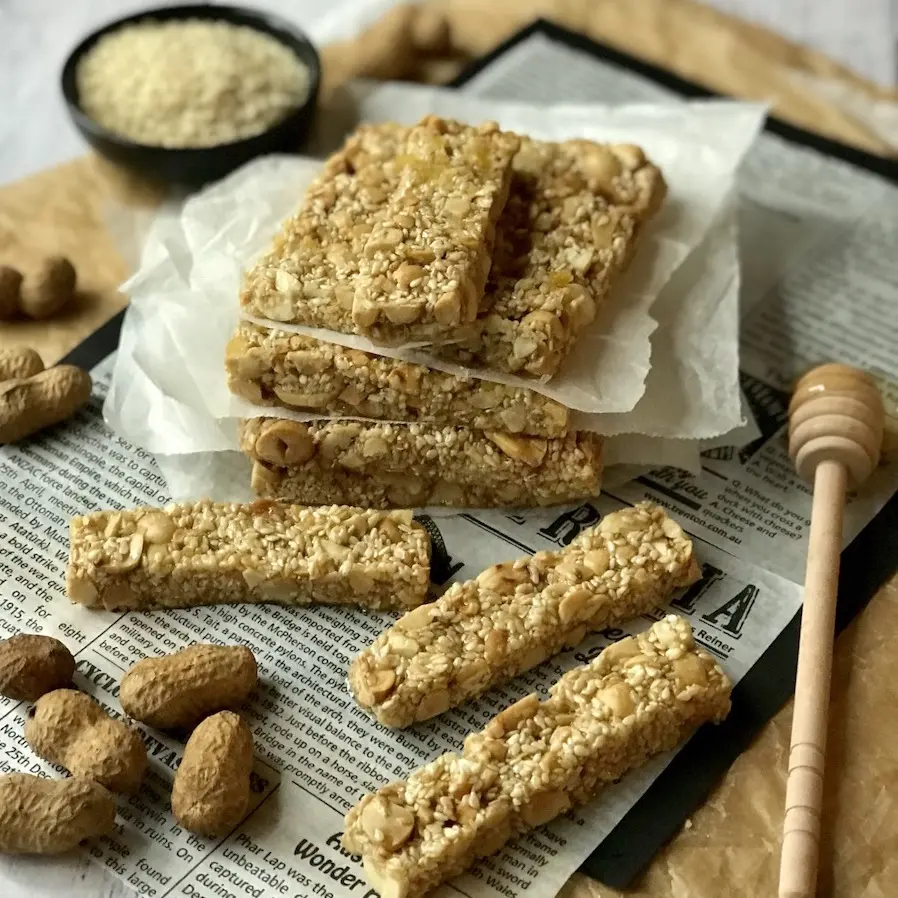
Peanut Sesame Bar

Posted on 31 Jan, 2024
Peanut Sesame Bar

Makes 11

1. Line a 20cm x 26cm tray with baking paper with greaseproof paper.

2. Roughly chop half of the peanuts.

3. In a medium sized pot, add honey and heat until boiling. Simmer gently on low heat for a few minutes (less if you want a chewy bar). Be careful not to burn the honey.

4. Add peanuts and sesame seeds. Mix through.

5. Remove from the heat and pour into prepared tray. Smooth into an even, flat slab. Lightly sprinkle salt on top and gently press into the surface.

6. Leave to cool on the benchtop for about 30mins then chill in the fridge for another 30mins.

7. To serve, lift the slab out of the baking tray and place on a chopping board. Carefully cut the slab in half, lengthways. Slice fingers/bar out of the two pieces. You should get 11 fingers from each piece.

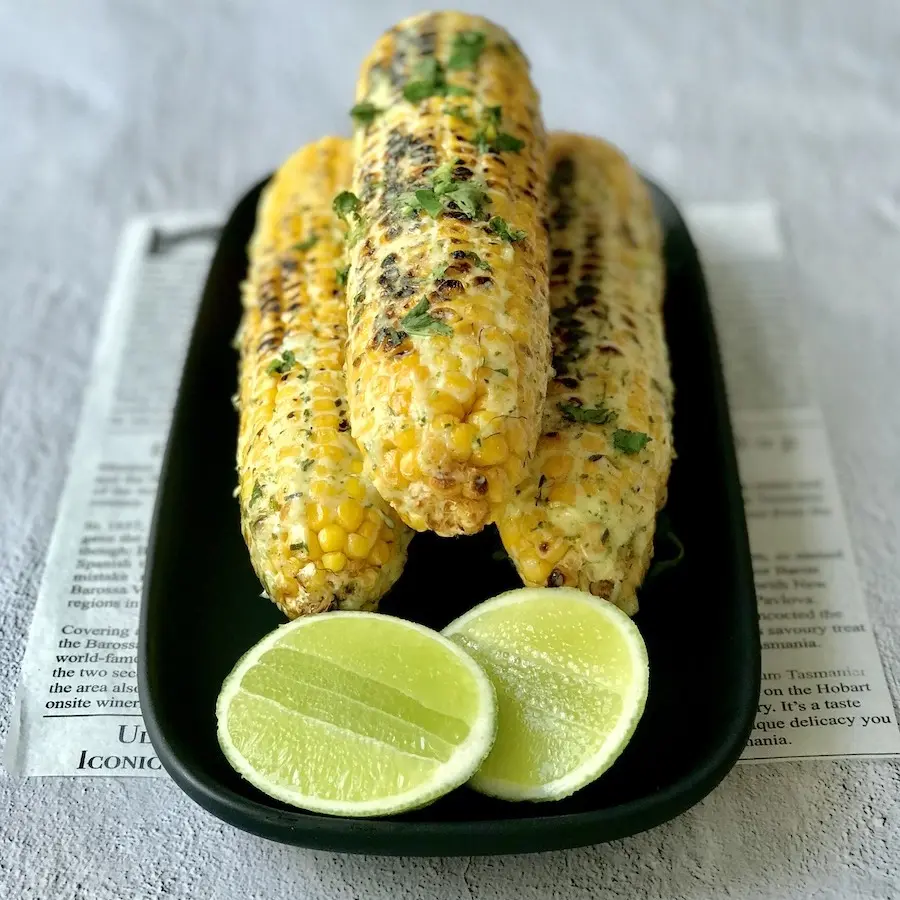
Grilled Corn

Posted on 17 Jan, 2024
Grilled Corn
  1. Remove any husk and silk from your corn cobs. Grill on the bbq or griddle pan on the stove, turning every so often so that everything cooks evenly.

While your corn is cooking, prepare the seasoned mayo.

  1. Zest the lime (keep the lime intact for later) and add to a small bowl.
  2. Remove the spine from the makrut lime leaves. Finely slice with a sharp knife then chop into fine pieces. Add to the bowl with the zest, along with the garlic and mayo. Mix to combine then season with salt to taste.
  3. When the corn is cooked, brush on the seasoned mayo and garnish with chopped coriander, finely grated Parmesan (optional) and dried chilli powder (optional).

Cucumber Salad

Posted on 03 Jan, 2024
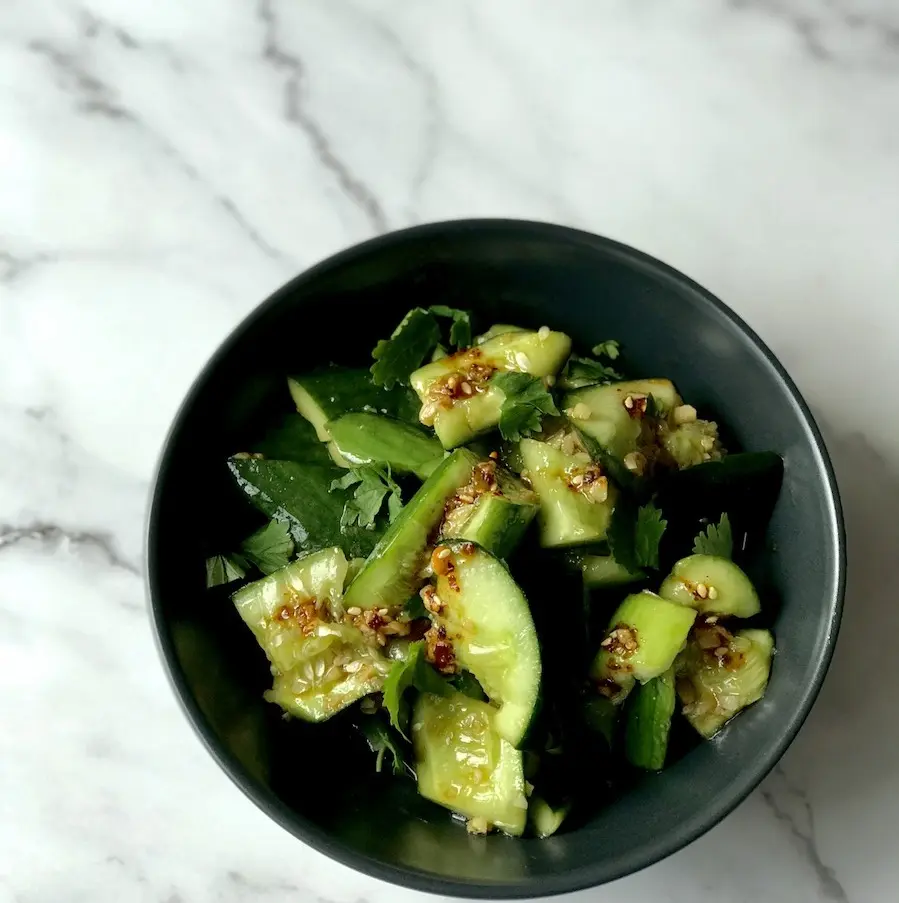
Cucumber Salad

1. Prepare your cucumber by cutting the ends off each one. Smash cucumbers with the side of a large knife/cleaver. Cut up smashed cucumber into chunks and place into a large bowl. Add salt and sugar and toss to coat. Set aside for 20mins.

2. Meanwhile, place chopped garlic into a medium sized heatproof bowl. Heat sesame oil in a dry pan until smoking. Carefully pour smoking oil onto the garlic. The hot oil will release the aroma in the garlic and help take away its raw edge/taste. Add in soy sauce, rice vinegar, Chinkiang vinegar and chilli oil to taste. Stir to mix.

3. Drain your cucumbers after 20min, leaving behind all the excess liquid. Place cucumbers in the bowl with the dressing and mix to evenly coat. Place salad in a serving bowl and garnish with fresh coriander.

Gochujang Buttered Noodles

Posted on 20 Dec, 2023
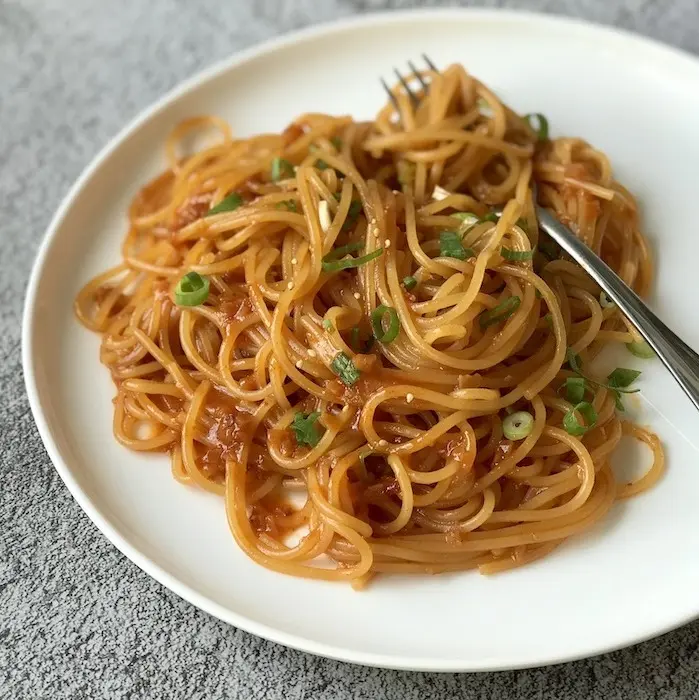
Gochujang Buttered Noodles
  1. Melt 2/3 of the butter in a large skillet and add in garlic. Season with salt. Cook until garlic starts to soften but hasn’t taken on colour.
  2. Meanwhile, cook pasta/noodles until slightly before al dente. Reserve 1 cup of the cooking water.
  3. Add gochujang, honey and vinegar to the garlic in the skillet. Stir through and bring to a simmer over med-high heat. Keep stirring the mix and continue to reduce the sauce until thickens (test by using your finger to draw a line through the sauce over the back of a spoon. The sauce is ready when the line drawn will hold and not fill back in).
  4. Add the noodles, along with some of the reserved cooking water to loosen. Toss through to coat, adding more water if necessary.
  5. Add remaining butter and toss through. Garnish with spring onions.

Serve and enjoy immediately.

Watermelon Rind Kimchi

Posted on 12 Dec, 2023
Watermelon Rind Kimchi
  1. Prepare the watermelon by cutting away all the green outer skin. Next up, cut away the watermelon flesh and save for another use. It’s ok if you leave a fine layer of flesh on the rind. Cut the rind into 1½ cm square chunks. Place prepared rind into a bowl and add salt. Mix to coat and leave for 1 hour, giving them a toss at the half way mark.
  2. After this time, your rinds will have released a lot of liquid. Drain the juice and rinse the rinds a couple of times with cold, running water. Squeeze out all the excess water. Add rinds to a mixing bowl, along with the rest of the ingredients. With gloved hands, mix until everything is well combined. You can gently massage the rinds with the seasonings to ensure that they are well coated.

Serve this kimchi immediately, or store in a sterilised glass jar in the fridge to enjoy the next day when the rinds have had a chance to develop more flavour. This kimchi is best eaten within a couple of days.

Korean Corn Cheese

Posted on 12 Dec, 2023
Korean Corn Cheese
  1. Preheat grill to very hot (maximum heat).
  2. Add corn, onion, mayo, sugar, and salt into a bowl and mix to combine.
  3. Melt butter in a small 8” cast iron skillet (or any stove to oven safe vessel) on the stove. Add corn mix and stir to heat through or until it starts to bubble. Turn off heat. Add half of the mozzarella and stir through. Sprinkle the rest of the mozzarella on top of corn mix.
  4. Place skillet under a hot grill to cook until the cheese has melted.
  5. Serve immediately.

Mango Sticky Rice

Posted on 05 Dec, 2023
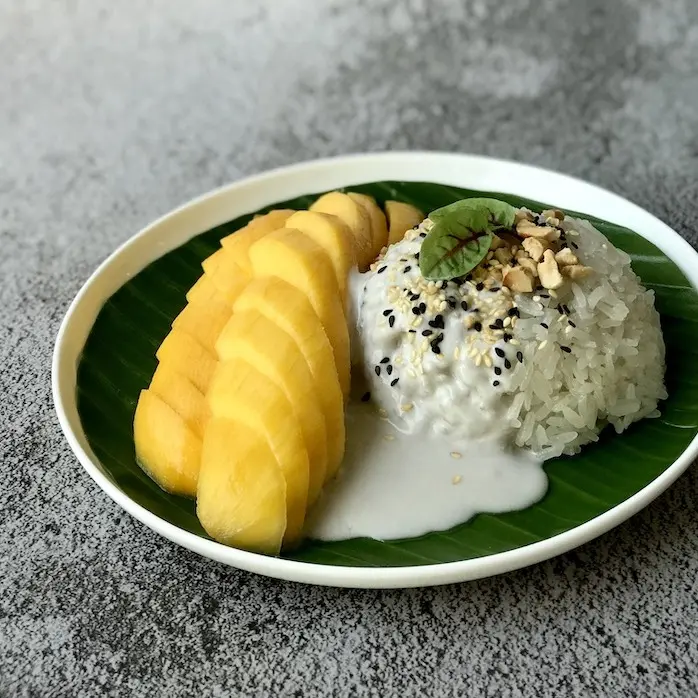
Mango Sticky Rice
  1. Add rice to a large bowl and fill with tap water. Leave to soak overnight.
  2. The next day, drain and rinse the rice under cold running water. Line a steamer basket with baking paper then fill with drained rice. Steam for 30 mins.
  3. Add 85mL coconut milk, caster sugar and salt into a large bowl. Mix to dissolve the sugar then add to the freshly steamed rice. Mix until everything is well combined then set aside for about an hour for the coconut milk to absorb into the rice.
  4. Meanwhile, make the coconut sauce by adding 315mL coconut milk, sugar and salt to a small pot.
  5. Tie the pandan leaf into a knot and add to the pot. Heat to dissolve the sugar. Simmer for 5 minutes then remove from the heat. Remove and discard the pandan leaf.
  6. Peel your mangoes then cut 2 mango cheeks from each mango. Place each cheek flat onto your cutting board and slice into a more bite sized pieces.
  7. Spoon a mound of sticky rice onto each serving plate. Place one cheek of mango next to each mound. Drizzle on coconut sauce and garnish with toasted peanuts and sesame seeds.

Chinese Flower Buns (Hua Juan)

Posted on 29 Nov, 2023
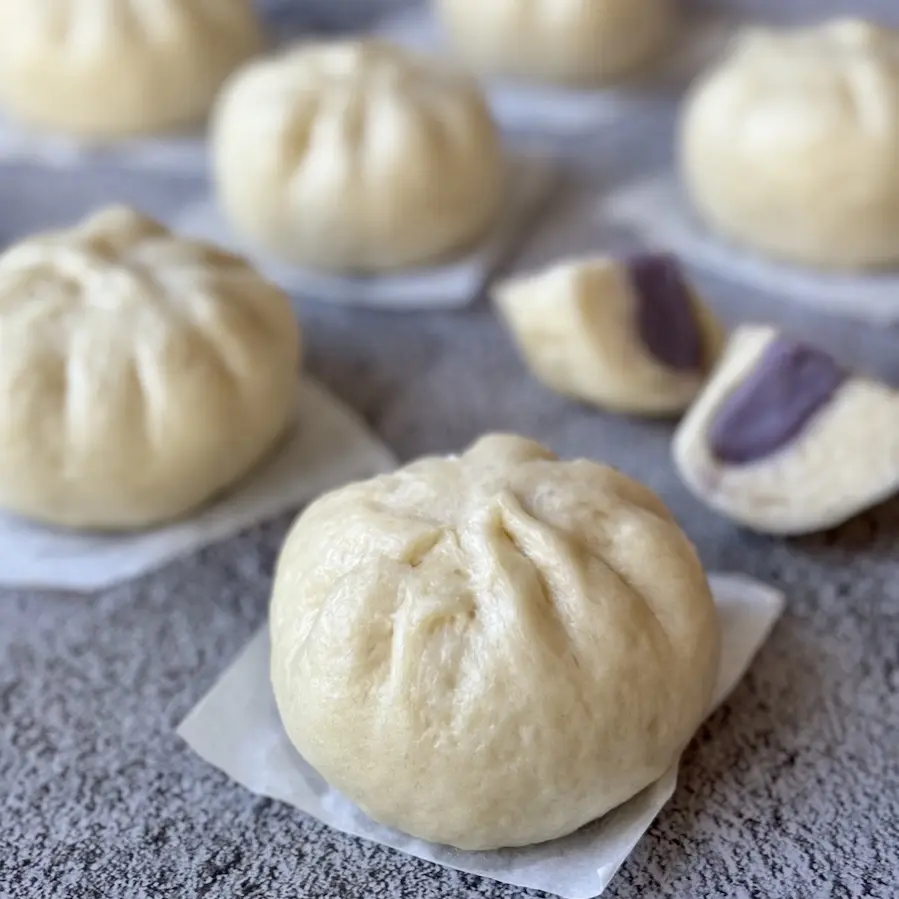
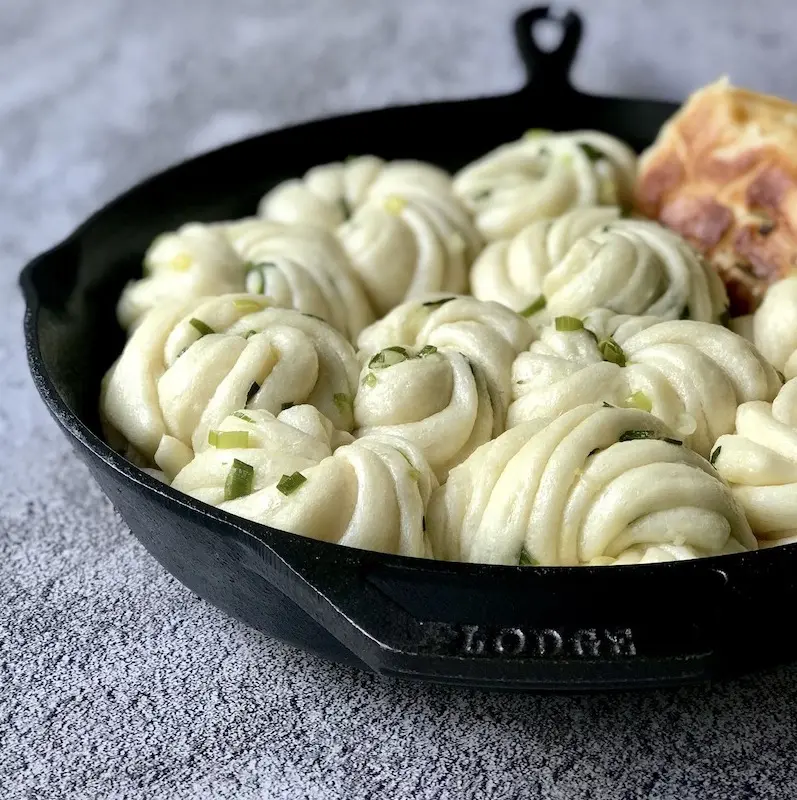
Chinese Flower Buns (Hua Juan)

Prepare the Dough and Oil

1. Add yeast, sugar and 250mL water to bowl and mix to combine. Leave for 10 mins until bubbles form.

2. Meanwhile, add the flour to the bowl of your stand mixer fitted with the dough hook attachment. Make a well in the centre and pour in the yeast mixture. Mix on the lowest speed for 10 minutes. Form dough into a ball and place in an oiled bowl. Cover and set aside for 2 hours.

3. Meanwhile, make the oil filling. Add the spring onions, Chinese five spice and salt into a heat proof bowl. Heat oil in a small pot/pan until smoking then pour into the bowl. Carefully mix to distribute flavours and set aside to cool completely.

4. After 2 hours, turn your dough onto a lightly floured work surface. Roll it out to approx. 2cm thickness. Dissolve baking powder and 2 tsp water in a small bowl then pour into the centre of the dough. Fold in the sides and knead through for about 2 mins or until smooth.

Shape the Dough

5. Roll dough into a large 20cm x 30cm rectangle. Brush on the seasoned oil mix (you may not need all of it. Gently mark the dough to divide it into three long strips. Fold the end pieces of the dough into the centre along the marked lines. You should end up with 3 layers of dough, stacked/folded on top of each other. Cut into 12 slices.  

6. Take one strip. Using a chopstick, press down along the length/centre of the strip. Stretch the strip to double in length. Drape the strip of dough over the chopstick. Pinch the enda closed with one hand while twisting the dough with the chopstick in the other. Place the twisted dough over the punched ends to cover. Lightly press down with your chopstick and slide it out. Repeat to shape the remaining buns

Cook the Buns

7. Heat 1-2T oil into a large 12” cast iron/non-stick skillet. Place in rolls. When the rolls start to brown, add in 200mL water. Cover with a lid and allow buns to steam on med heat until all the water has almost evaporated. Uncover and allow the water to fully evaporate and the buns to take on more colour for another minute or so.

Serve warm.

Taro Snow Skin Mooncake

Posted on 27 Sep, 2023
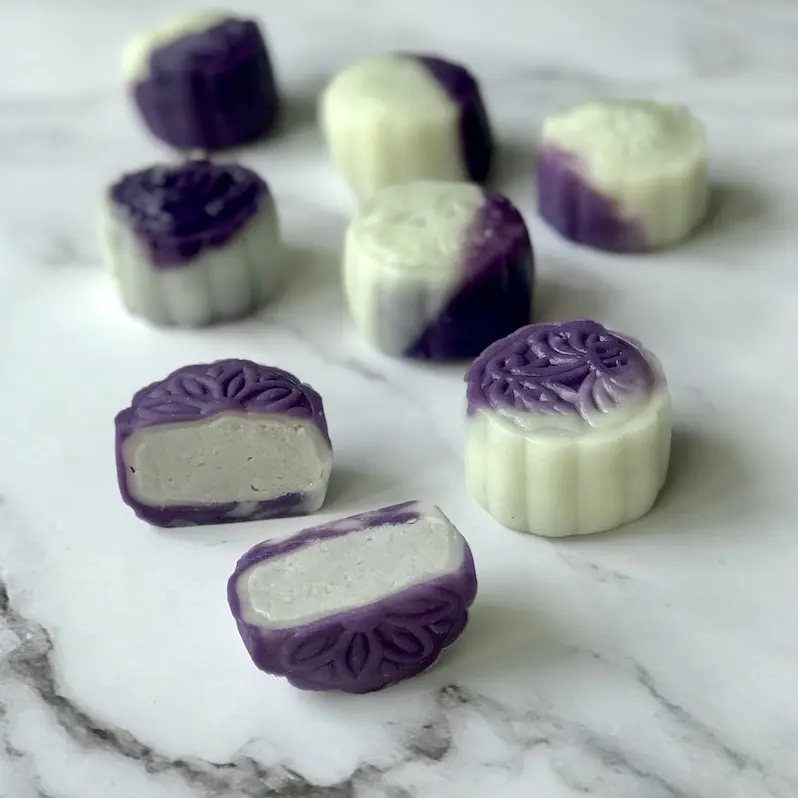
Taro Snow Skin Mooncake

Part A. Make the Filling

200g frozen taro, thawed & cut into 2cm chunks
70g caster sugar
2T cornflour
2T coconut milk
1T cornflour

1. Steam taro for 30mins or until fully cooked through.

2. Place cooked taro in a med bowl and mash. Add the rest of the ingredients and mix together. Push through a fine sieve to remove any lumps.

3. Cover with cling film and place in the fridge to chill and set.


Part B. Make the Snow Skin

40g glutinous rice flour
40g rice flour
20g wheat starch
20g caster sugar
150g full cream milk


20g canola oil
A drop of ube/purple food colouring

4. Add flours, wheat statch, sugar and milk into a heatproof bowl. Whisk until smooth then cover the bowl with cling film. Steam for 20mins or until the centre is fully set.

5. Remove bowl from the steamer and discard the cling film. Add in oil and carefully work it into the mix.

6. Break off 1/3 of the dough and add food colouring. Knead the colour through then divide into 10 even portions. Divide the white dough into 10 even portions.

7. Pair one portion of purple dough with one portion of white dough. Continue until you have 10 pairs of purple and white dough. Cover with cling film and allow to cool completely.


Part C. Make the Snow Skin Mooncakes

8. Divide the prepared taro filling into 10 equal portions and form into balls.

9. Grab one blue and white dough combo. Form into a ball and roll into a disc. Wrap the disc around a taro ball and seal completely. Shape using the mooncake mould. You can use a little cornflour if you’re finding the dough a little sticky.

These mooncakes are best enjoyed on the day they are made.

PS: If you don’t have mooncake moulds, you can just present these sweet treats as taro and coconut filled mochi balls! Go one step further if you want to unleash you inner creative skills … shape the mochi balls into cute figurines like bunnies, kittens, hedgehogs etc by using a small pair of pointed sharp scissors to snip in ears and spines.


Banana Fritters

Posted on 15 Aug, 2023
Banana Fritters

Makes 20 Fritters

Prep Time: 5mins plus 30mins waiting time

Cook Time: 30mins

Total Time: 50mins plus 35mins waiting time

1. Add AP flour, rice flour, sesame seeds, coconut, baking powder and sugar to a medium sized bowl. Mix until well combined. Add water and mix to form a batter. Set aside for 30mins.

2. Peel bananas and split in half, lengthways. Sit each piece of banana flat side down, then flatten the curved side with the blade of a cleaver or large knife.

3. Heat oil in a wok or large pot on medium heat. The oil is ready when a bamboo chopstick/wooden spoon starts bubbling when placed in the hot oil.

4. Prepare and cook fritters in batches. Dip bananas, one at a time, into the batter to coat then carefully slide into the hot oil. Do not overcrowd the oil. Cook until lightly golden, turning occasionally when needed. Drain on a wire rack and repeat with remaining bananas.

5. Turn up the heat on the oil and re-fry the fritters. You can crowd the oil in the second fry. Fry until golden and crunchy. Rest on a wire rack.

6. Serve fritters on their own, with a side of ice cream, coconut butterscotch sauce, or all of the above!

Lemongrass Mock Meat Stir Fry

Posted on 17 Apr, 2023
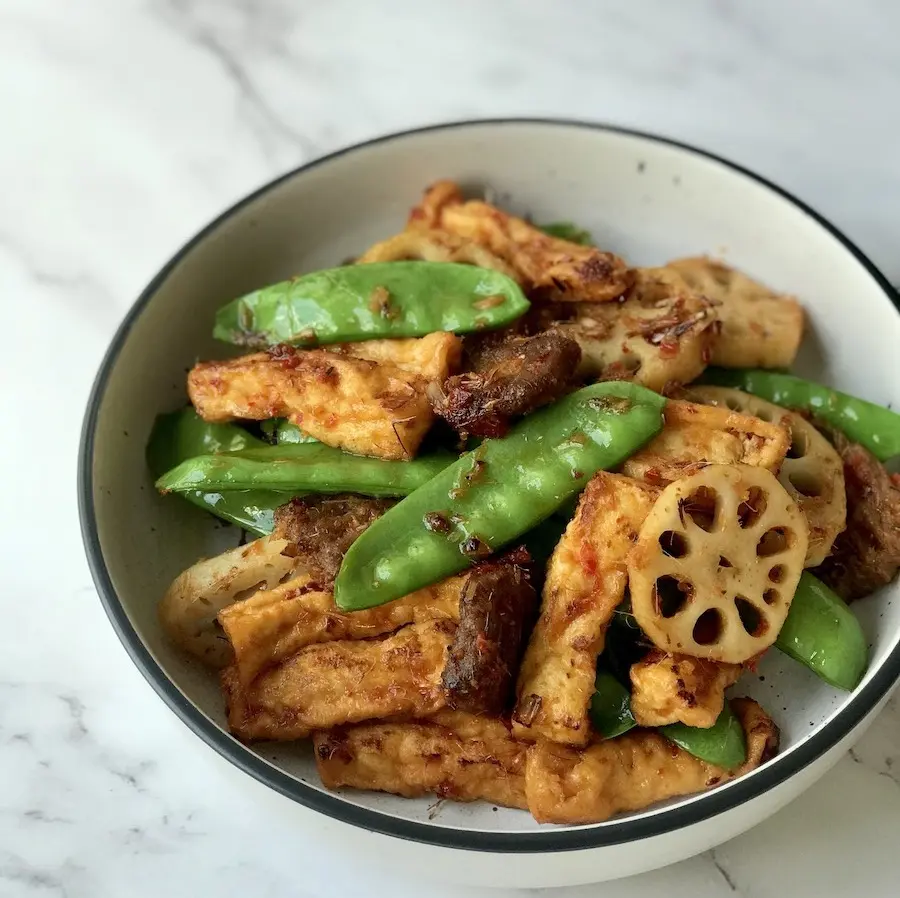
Lemongrass Mock Meat Stir Fry

Prepare the Tofu Chips

  1. Cut lemongrass and chilli into 1½ cm pieces and blitz in a strong food processor until the mix resembles straw. If you don’t have a processor, you can finely slice the lemongrass stalks into rings before finely dicing together with the chilli.
  2. Add lemongrass and chilli mix to a bowl, along with the soy sauce, salt and honey. Mix to combine. Add tofu chips and coat. Leave to marinate for one hour.

Now for the Stir Fry

  1. Heat 3T oil in a wok or non-stick skillet. Add marinated tofu chips and sauté to heat through. When the tofu starts to develop a little sear, remove from the pan and set aside (along with all the marinade).
  2. Heat 1T oil in the wok. Add mock meat and sauté to heat through.
  3. Add lotus roots and sauté to heat through.
  4. Return the tofu chips and marinade to the wok and sauté.
  5. Add snow peas* and sauté until desired doneness.
  6. Taste and adjust seasoning if necessary, by adding salt or a little vegetarian stir fry sauce.

Serve with steamed rice

*You can simply add these into your stir fry raw and allow the ingredients in the pan to heat them through, or blanch them in a pot of boiling water (with salt and oil added to retain its colour) first for 10 seconds before draining and setting aside until needed.

Garlic Mushroom Mix

Posted on 28 Mar, 2023
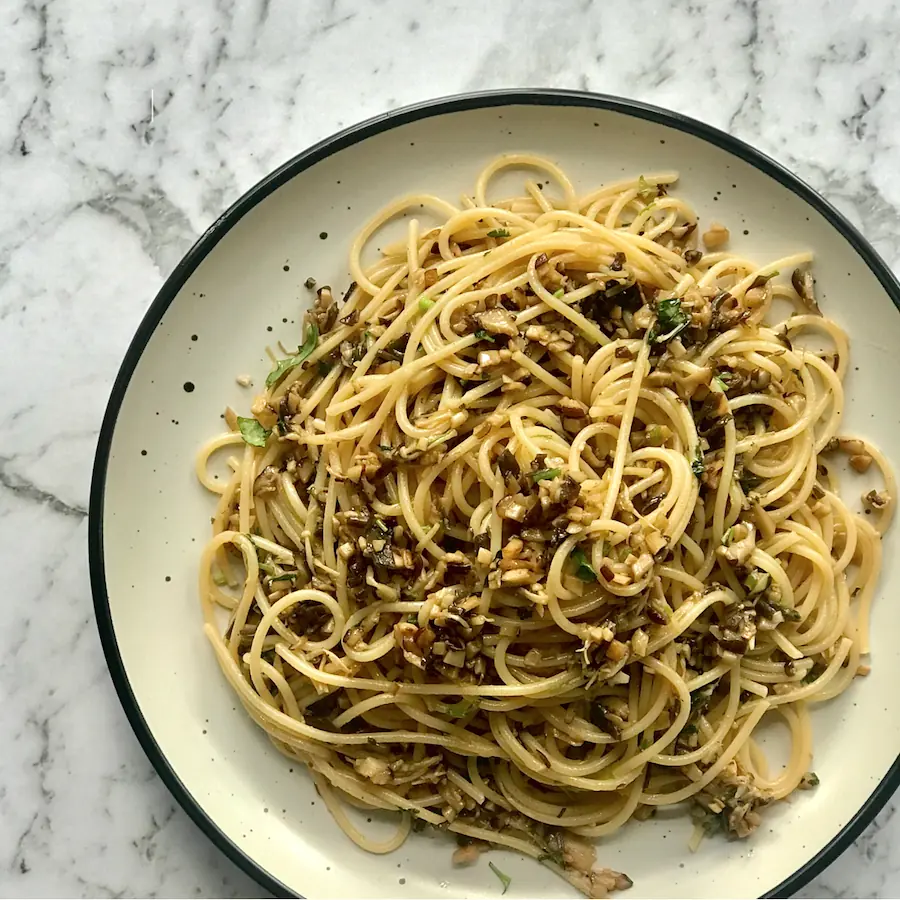
Garlic Mushroom Mix

Prepare the Mushrooms

  1. Rehydrate the wood ear mushrooms in a bowl with boiling water and leave them to soak for about 30 mins. Once ready, drain away water, squeeze out excess water and cut out any hard central bits.Roughly chop and set aside.
  2. Remove any dirt/debris from the fresh mushrooms with a pastry brush (natural hair brush, not silicone). Give the mushrooms a wipe with kitchen paper towel if necessary.
  3. Chop the king mushrooms into small pieces (3-5mm).
  4. Remove the hard woody stems from the shitake mushrooms and chop into small pieces - cut all mushrooms to the same size.
  5. Slice away and discard the bottom part of the enoki mushroom (like removing the woody ends off asparagus spears). Cut the stems into 2cm lengths.

Time to Cook

Tip: Cook your mushrooms in batches. Do not overcrowd your pan as your mushrooms will stew. I cooked my mushrooms in 3 separate batches

  1. Heat a large skillet on high and add 3 T olive oil.  Add in 1/3 of the chopped garlic. Saute and let it sizzle for about 20 minutes.
  2. Add in 1/3 of the chopped king mushrooms and 1/3 of the chopped shitake mushrooms. Stir to coat the mushrooms in the garlicky oil. Let the mushrooms cook in the pan, giving it a stir every now and then to prevent burning. The mushrooms should shrink in size and develop colour.
  3. Add in 1/2 tsp salt and stir through.
  4. Add in 1 1/2 T vegetarian oyster sauce and stir through. Be careful not to burn the sauce.
  5. Add in 1/3 of the chopped enoki mushrooms and stir through. When the enoki mushrooms wilt a little, you can add in 1/3 of the chopped wood ear mushrooms.
  6. Give everything a good stir through and add crack pepper.
  7. Your mix is ready when the mushrooms have shrunk in size, dehydrated in the pan and developed colour and depth of flavour.
  8. Throw in 1/3 of the chopped coriander.
  9. Taste and season further if necessary.
  10. Place prepared mushroom mix in a large mixing bowl.
  11. Now repeat and make another two batches of shiitake & king oyster mushroom, adding each completed batch into the same large mixing bowl.

When all three batches are prepared, mix them altogether in the mixing bowl to combine. There should be 650-700g of mushroom mix, ready to use.

Serve with noodles or rice

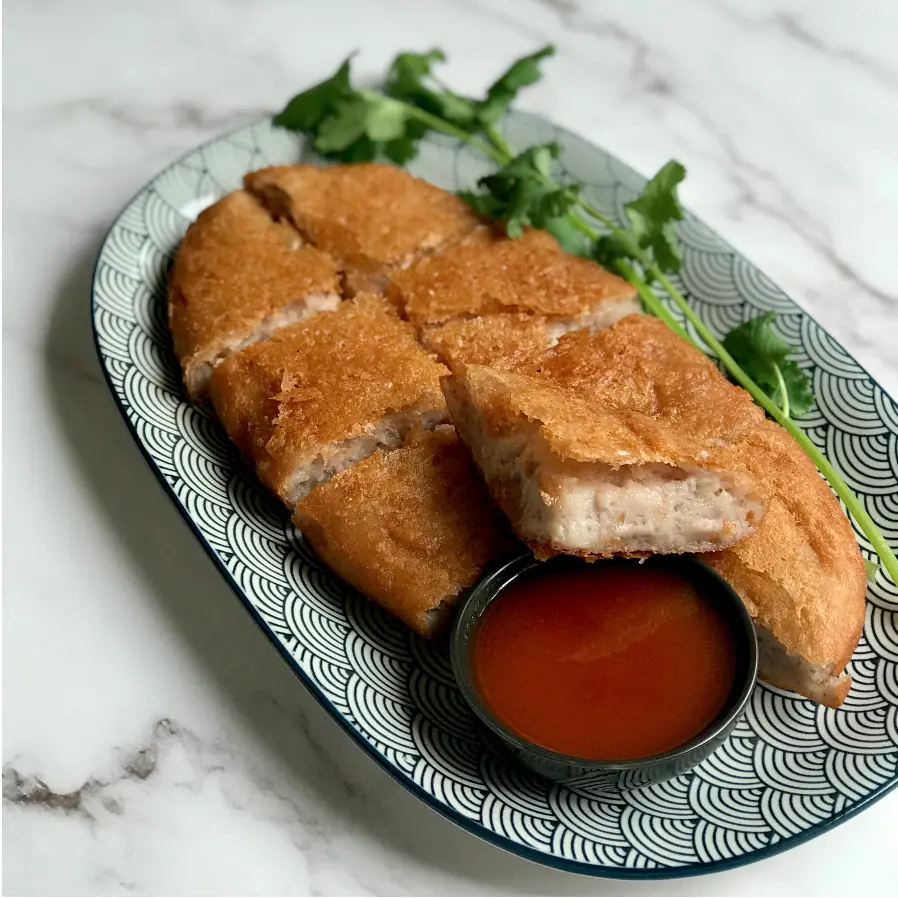
Deep Fried Taro

Posted on 28 Mar, 2023
Deep Fried Taro

Serves 4-6 (as part of a shared meal)

For the taro:

1. Cut the taro into 1cm slices then steam for 20mins or until cooked.

2. Place cooked taro into a large bowl and add seasonings. Roughly mash to mix the seasonings evenly through the taro.

3. Add wheat starch to a small, heatproof bowl. Add boiling water and mix with a spoon to make a rough paste. Add this paste to the taro and mix to combine.

4. Add 1/2T canola oil to the taro and quickly mix with gloved hands to reach a smooth, shiny ball.

5. Lightly grease a large piece of cling film with oil and place taro onto the centre. Press down and shape into an oval disc (27cmx14cm). Wrap and place in the freezer for a couple of hours or so to firm up.

6. Heat oil in a large wok and deep fry taro disc (remove cling wrap first) until golden. Place on a wire rack to quickly drain.

7. While still hot, cut taro disc into serving pieces on a chopping board and serve with dipping sauce.

For the sauce:

1. Add all sauce ingredients into a small pot and heat to dissolve the sugar. Simmer until the sauce has thickened to your liking.
 

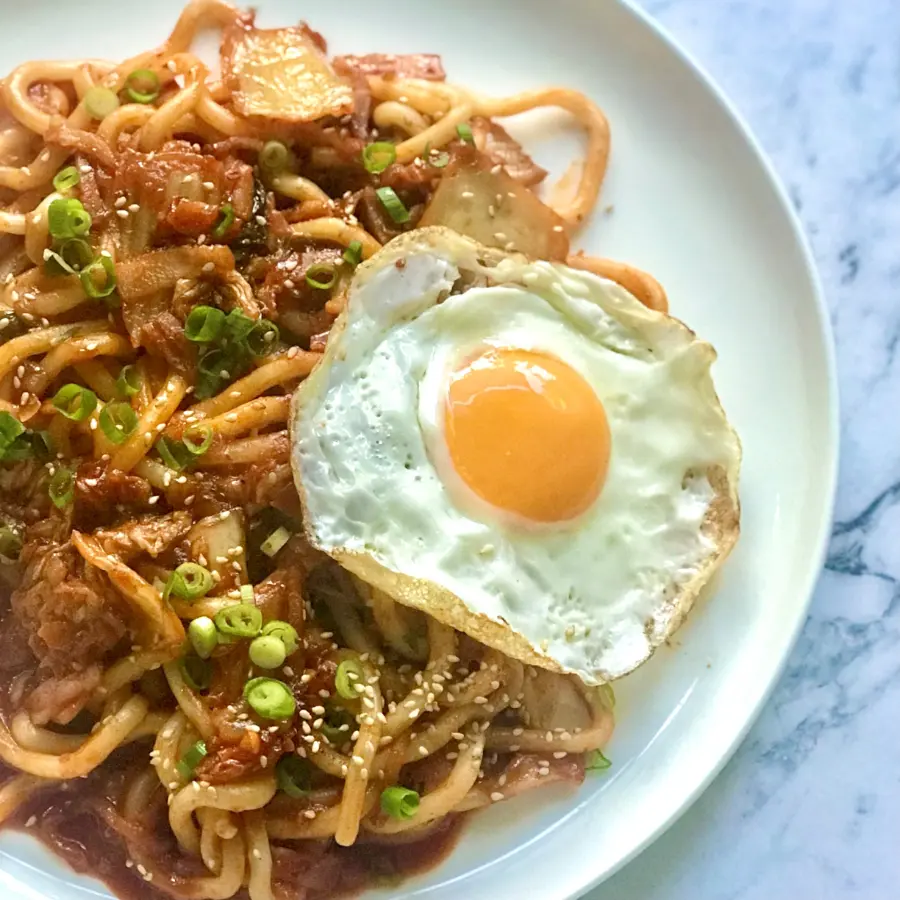
Stir fried Kimchi Udon

Posted on 28 Mar, 2023
Stir fried Kimchi Udon

1. Place udon in a heatproof bowl. Cover with boiled water. Leave on the benchtop while you make the sauce. (The water is needed to just loosen the strands of noodles without breaking them.)

2. In a large skillet or wok, add oil, shallots and garlic. Sauté on medium heat for 1min to release their aroma.

3. Optional: Add in sliced bacon (or other marinated meats of your choice) and continue to stir until the fat is translucent and there is a bit of colour on your bacon 

4. Add in gochujang and stir to mix through.

5. Add in kimchi, then honey and stir through.

6. Reserve 1/4 cup of liquid from your noodles. Using a colander, drain away the rest of the water, leaving behind the noodles. Gently give the colander a shake to separate the strands of udon.

7. Add noodles to the work and stir through. Add in reserved noodle water and mix through until the sauce has emulsified. Remove from the heat when the sauce reaches the thickness you desire.

Serve on a plate, garnished with toasted sesame seeds and sliced spring onions. Top with a fried egg and enjoy!

Tagged udon, kimchi

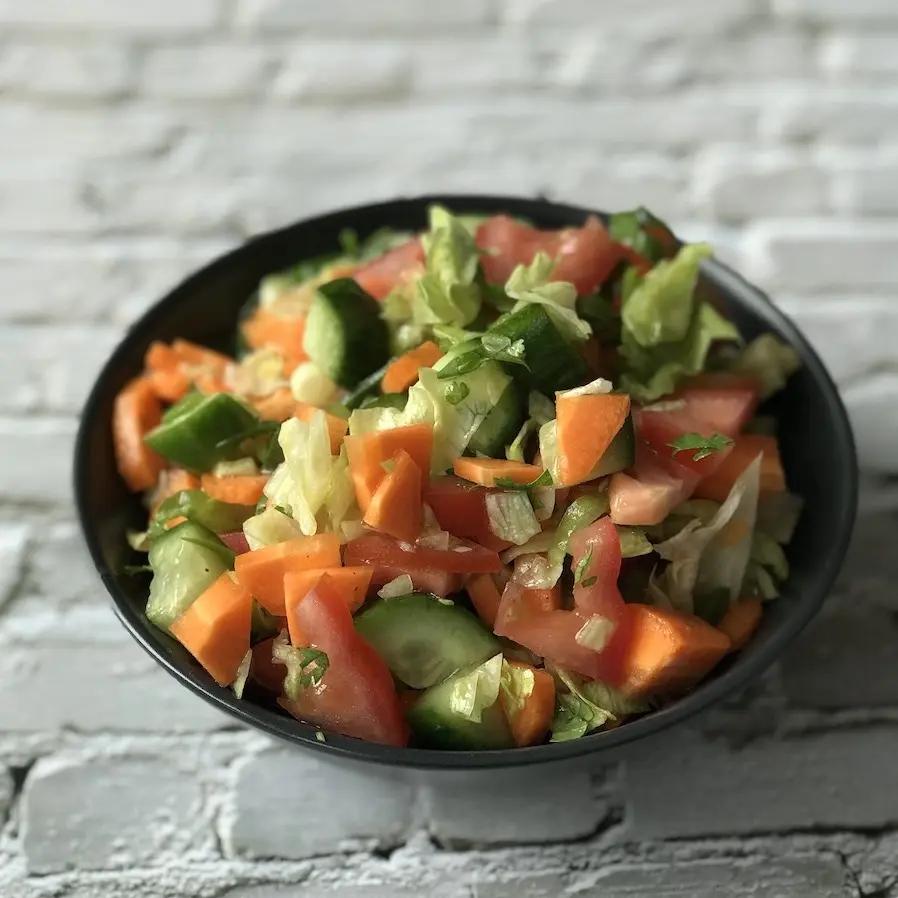
Chop Salad

Posted on 24 Oct, 2022
Chop Salad

1. Add all ingredients into a mixing bowl and give it a good mix. 

Pro tip: If you have time, let the salad sit for 30 mins so that the salt and vinegar can do its thing in bringing you more flavour. Feel free to jazz it up with olive oil, add in eggs or other veggies you want. This recipe is so versatile that it virtually works with so many different vegetables. 

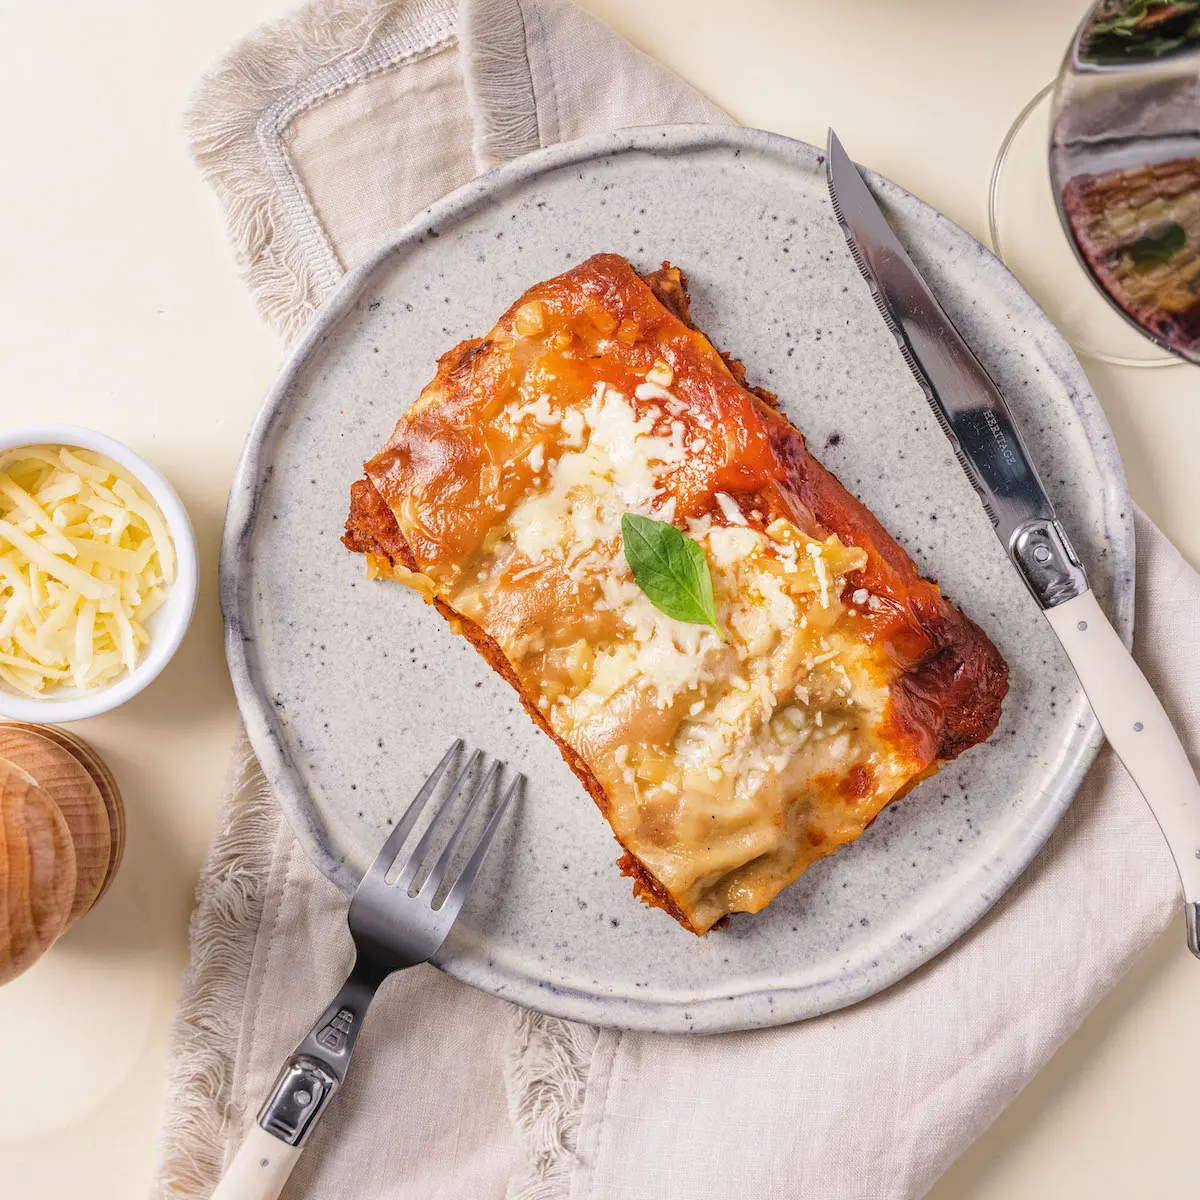
Meatless Lasagne

Posted on 10 Oct, 2022
Meatless Lasagne

Cook from frozen & do not thaw 

Microwave:

1. Remove meal from cardboard sleeve

2. Microwave on HIGH for 4 minutes and 30 seconds

3. Remove from the microwave. Allow to stand for 1 minute before peling off the film 


Conventional Oven- 

1.Pre heat over to 180 degrees celcius 

2. Remove frozen mean from cardboard sleeve. Peel off plastic film from the tray

3. Bake for 15 minutes.

4. Remove from the oven. Allow to stand for 1 minute before peling off the film 

Tagged lasagne