Help & Support 02 9161 8036
Welcome Guest

Recipes

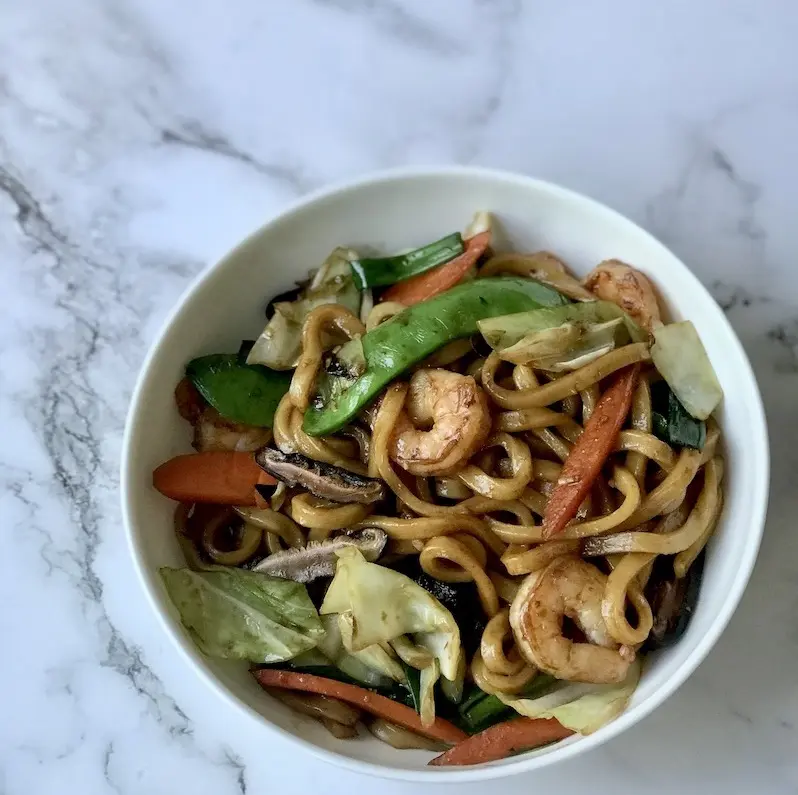
Yaki Udon

Posted on 14 Feb, 2024
Yaki Udon
  1. Season prawns with salt and oil. Mix until well combined and set aside.
  2. Add sauce ingredients in a bowl and mix. Set aside.
  3. Place frozen bundles of udon noodles in a large bowl. Pour in boiling water to cover then use a pair of chopsticks to gently loosen the noodles. Drain and rinse noodles with cold tap water after 30 secs. Set aside.
  4. Heat wok over high heat. Throw in prawns and let them cook in one layer until they curl and start to colour on the underside. Toss them in the heat to colour all sides and remove when almost cooked through.
  5. Add 2T oil to the wok then add carrots and cook for 30 secs on high heat. Add cabbage and mushrooms and cook for 30 secs. Add snow peas and spring onions and cook for 30 secs.
  6. Add prawns back in the wok. Toss quickly to mix through.
  7. Add noodles and pour the prepared sauce on top. Gently toss the noodles to allow the sauce to evenly coat. Toss everything in the wok to mix and heat through. When the sauce has almost evaporated, turn off the heat and divide between two serving bowls/plates.

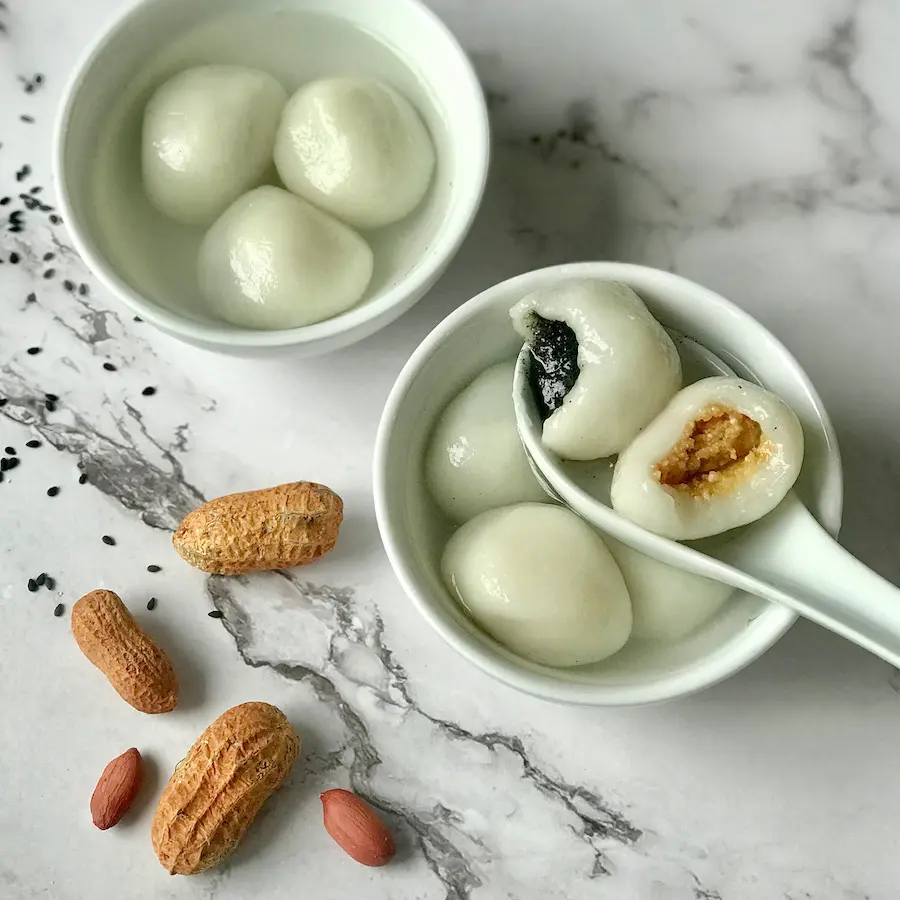
Tang Yuan

Posted on 08 Feb, 2024
Tang Yuan

Prepare the Black Sesame Filling

  1. Toast the sesame seeds in a dry pan for 5-8 mins on medium-low heat, stirring continuously until fragrant. Cool completely before adding to a food processor. Blitz to grind seeds to a paste. Add sugar and pulse to combine. Add butter and pulse to combine. Place filling in a bowl, cover and chill for 30 mins to harden.
  2. Once the filling is chilled, you will be able to portion it into little 5g balls. If the balls are too soft, return them the fridge for another 10-20 mins to set before continuing. 

Prepare the Peanut Filling

  1. Toast the peanuts in a dry pan for 3-5 mins on medium-low heat, stirring continuously until fragrant. Allow to cool completely. I like to pound my peanuts using a mortar and pestle until they resemble rough sand. Add sugar and mix through. Add butter and mix through. Place filling in a bowl, cover and chill for 30 mins to harden.
  2. Once the filling is chilled, you will be able to portion it into little 5g balls. If the balls are too soft, return them the fridge for another 10-20 mins to set before continuing. 

Prepare the Dough

  1. Add glutinous rice flour and potato starch in a bowl. Slowly add in the water, stirring as you go until a smooth ball is formed. You may not need all the water.
  2. Break off 12-13g balls from your dough. Make rice balls one at a time, flattening the dough ball into a disc, placing a ball of filling in the middle then enclosing the dough over the filling. Roll the ball in your hands until it’s round and smooth. Set aside while you make the rest of the balls.

You can freeze the balls at this stage (do not allow them to touch) and cook them at a later stage.

Prepare the Sugar Syrup

  1. Add sugar, water and ginger slices to a large bowl. Bring to the boil, stirring to melt the sugar. Once the syrup starts to boil, reduce the heat to low until it is ready to receive the rice balls.

Cook the Tang Yuan

  1. Bring a large pot of water to the boil. Cook your tang yuan in batches by slowly adding into the boiling water. Carefully nudge them so that they don’t stick to the bottom of the pot and to each other. After one minute, remove them with a slotted spoon and transfer them directly into the simmering sugar syrup. Cook for a further minute or until they rise to the top.

Serve tang yuan warm in a bowl partly filled with the sugar syrup.

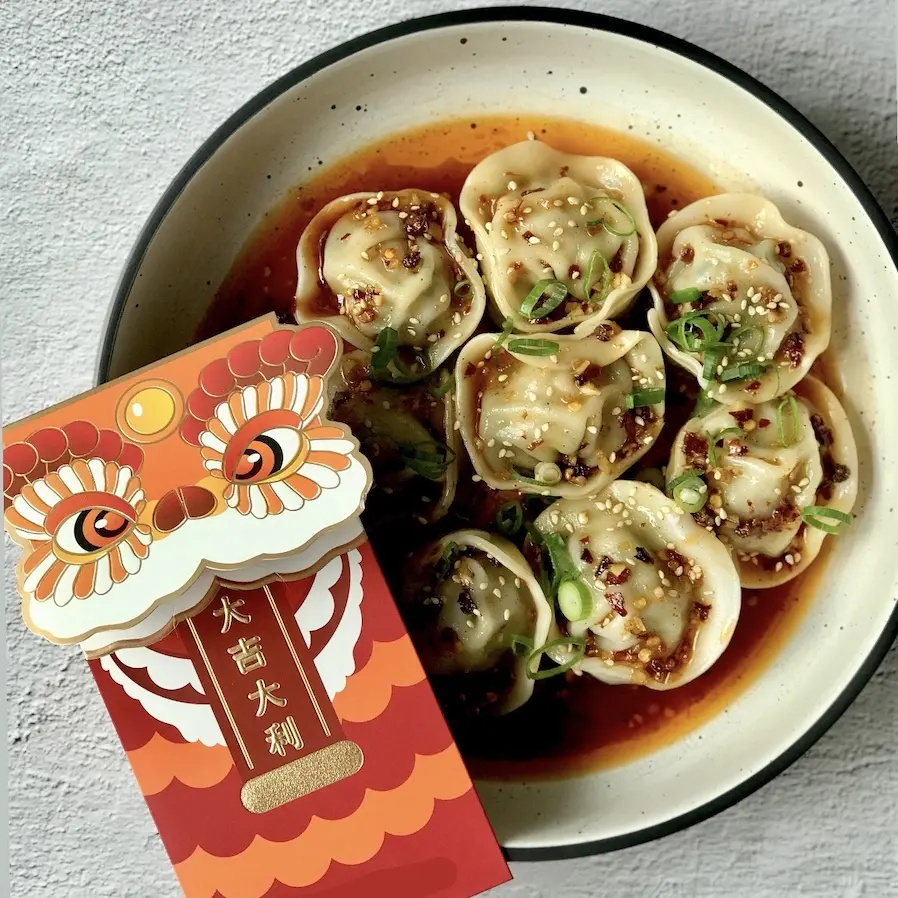
Dumplings in Chilli Oil

Posted on 07 Feb, 2024
Dumplings in Chilli Oil

Serves 30-50

Make the Dumplings

  1. Add dumpling filling into a bowl and mix until well incorporated. Fill dumplings using store bought wrappers, sealing them with a bit of water. You can make these ahead and freeze in one layer (do not allow them to touch each other). Cook them directly from frozen (do not thaw).
  2. To cook, bring a large pot of water to the boil. When it’s at a raging boil, add dumplings and cook in batches, for 5-6mins each batch, or until the dumplings are cooked through.
  3. Remove dumplings with a slotted spoon/spider and place directly into the prepared sauce. Toss to coat then garnish with sliced spring onion and toasted sesame seeds.

Make the Chilli Oil Sauce

  1. In a large shallow bowl, add garlic, sugar, Chinese five spice, chicken powder and Szechuan peppercorns in the centre.
  2. Heat oil to smoking point then pour over the garlic mix to release the flavours. Give everything a stir then add the rest of the ingredients and mix through. Set aside.

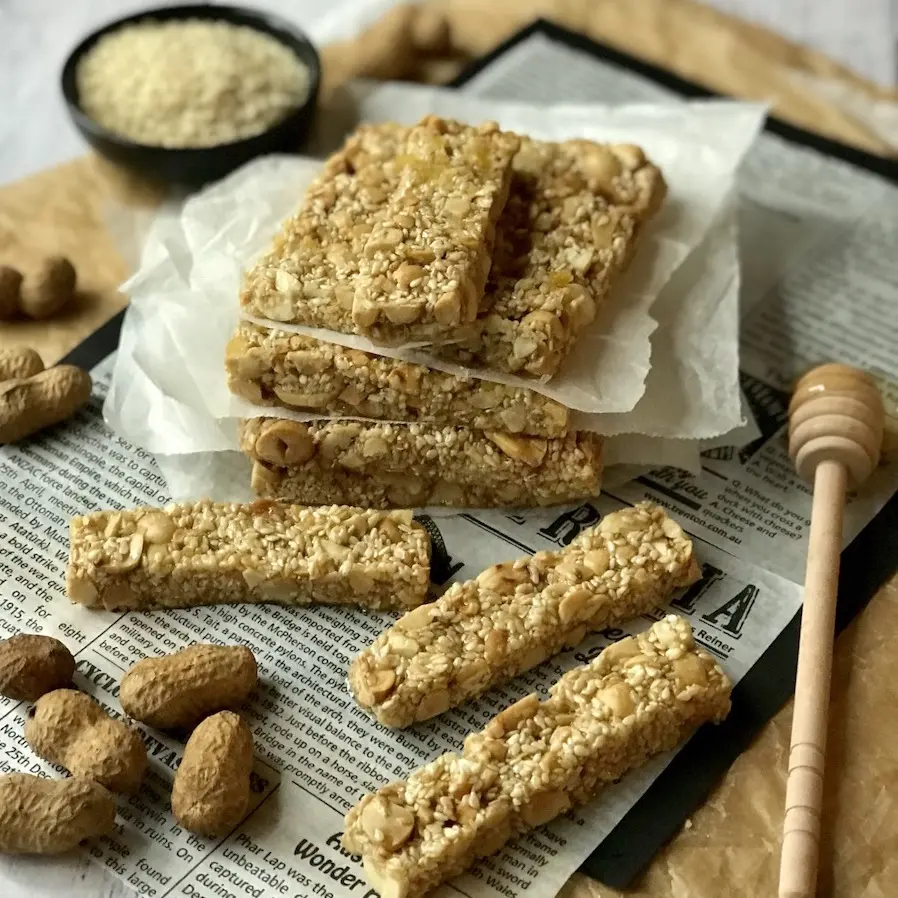
Peanut Sesame Bar

Posted on 31 Jan, 2024
Peanut Sesame Bar

Makes 11

1. Line a 20cm x 26cm tray with baking paper with greaseproof paper.

2. Roughly chop half of the peanuts.

3. In a medium sized pot, add honey and heat until boiling. Simmer gently on low heat for a few minutes (less if you want a chewy bar). Be careful not to burn the honey.

4. Add peanuts and sesame seeds. Mix through.

5. Remove from the heat and pour into prepared tray. Smooth into an even, flat slab. Lightly sprinkle salt on top and gently press into the surface.

6. Leave to cool on the benchtop for about 30mins then chill in the fridge for another 30mins.

7. To serve, lift the slab out of the baking tray and place on a chopping board. Carefully cut the slab in half, lengthways. Slice fingers/bar out of the two pieces. You should get 11 fingers from each piece.

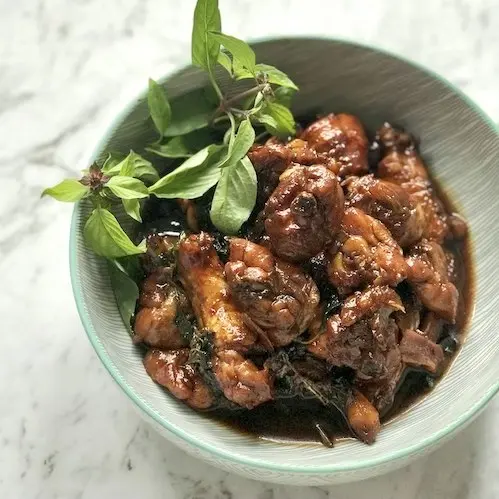
Taiwanese Thee Cup Chicken

Posted on 24 Jan, 2024
Taiwanese Thee Cup Chicken

1. Heat sesame oil in a hot wok. Add in ginger and garlic and allow to inguse for about a minute or so. Be careful to not burn these aromats.

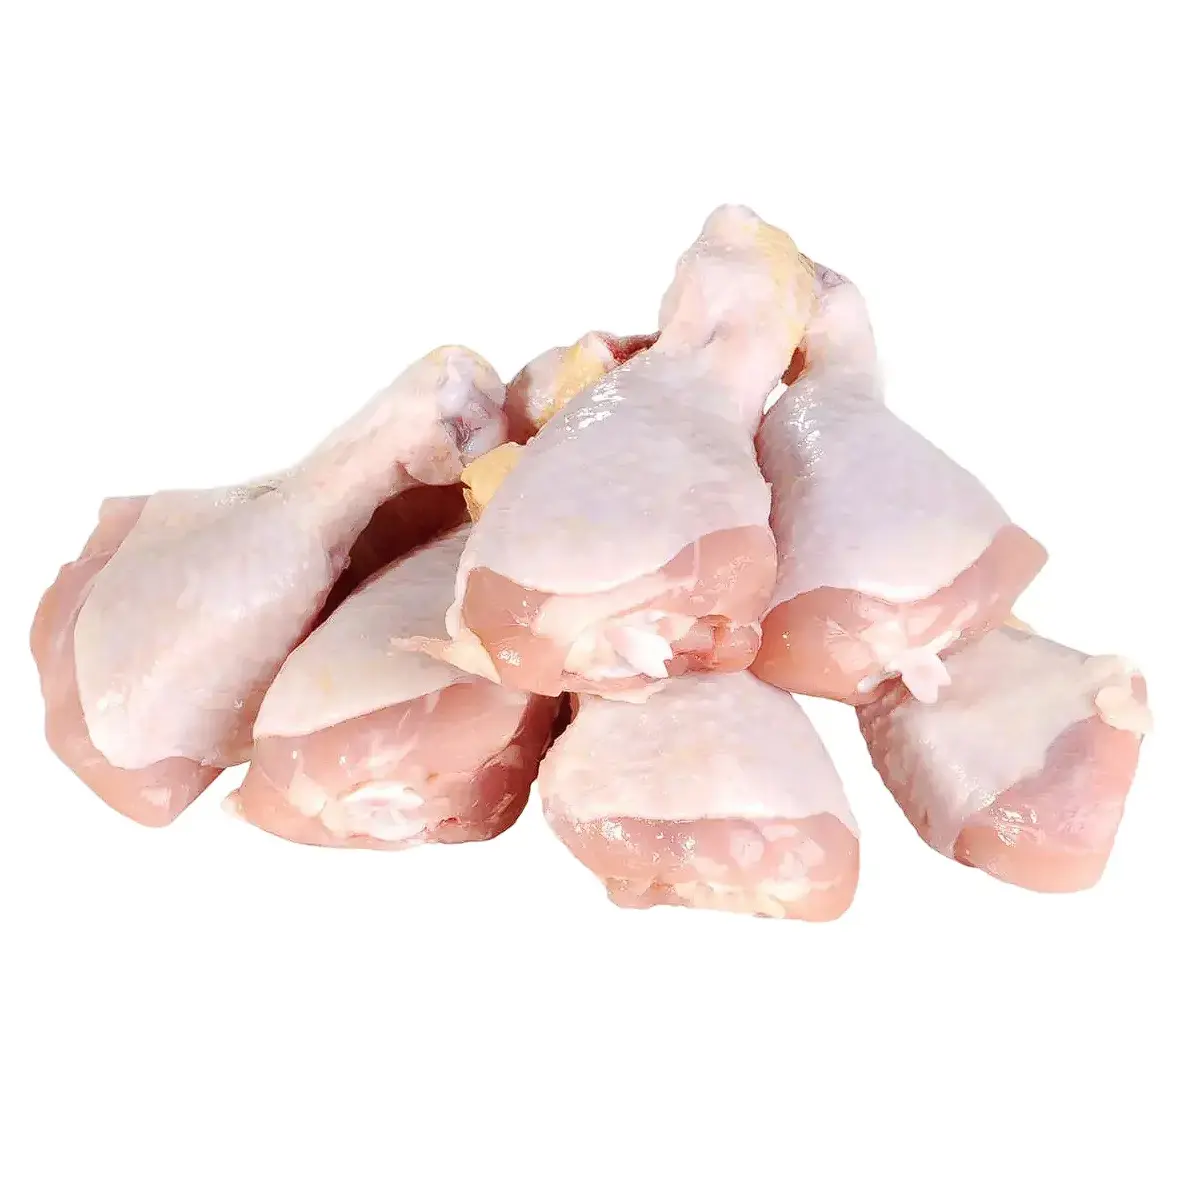
2. Add in chicken pieces in one layer and sear all sides (high heat).

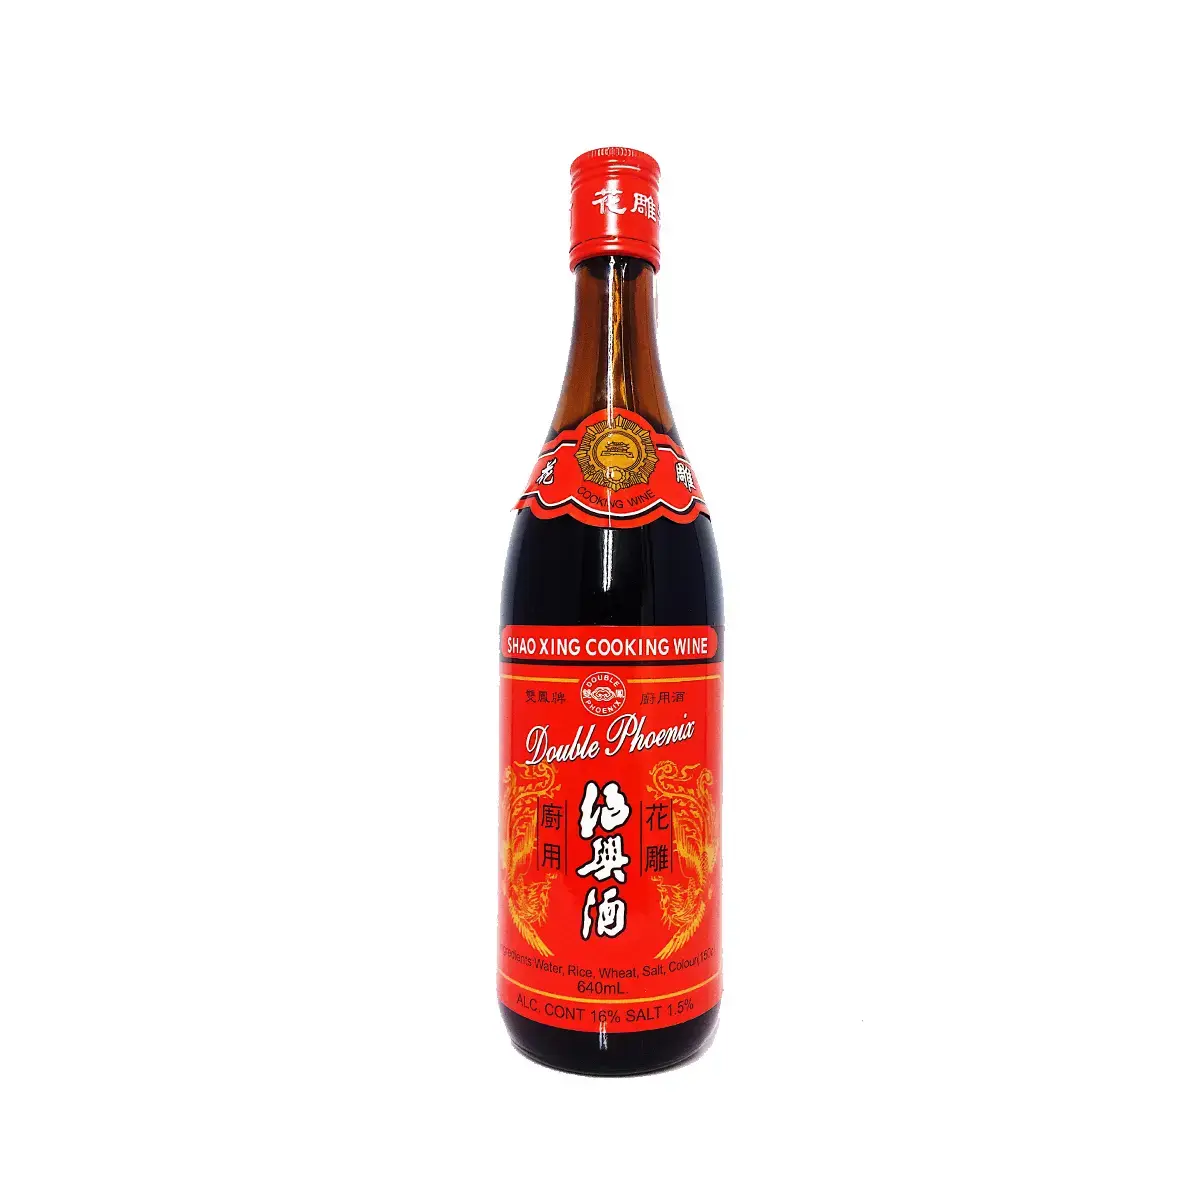
3. Add in cooking wine and all the soy sauces. Turn to mix through then cover. Turn the heat down to low and allow to simmer for 15 minutes.

4. Remove the lid and give everything a stir. Simmer uncovered for another 15-20 minutes and give everything a stir once in a while. We like a dark braise on our chicken pieces and thicker, rich sauce, so we let ours braise for as long as possible, before the sauce gets too salty. 

5. Add in Thai basil (we use all the tender stems as well, so no need to pick off the leaves) and stry through until wilted. Served with a sprig of fresh basil (optional)  

6. Serve over a bowl of steamed rice. 

Tagged chicken dish

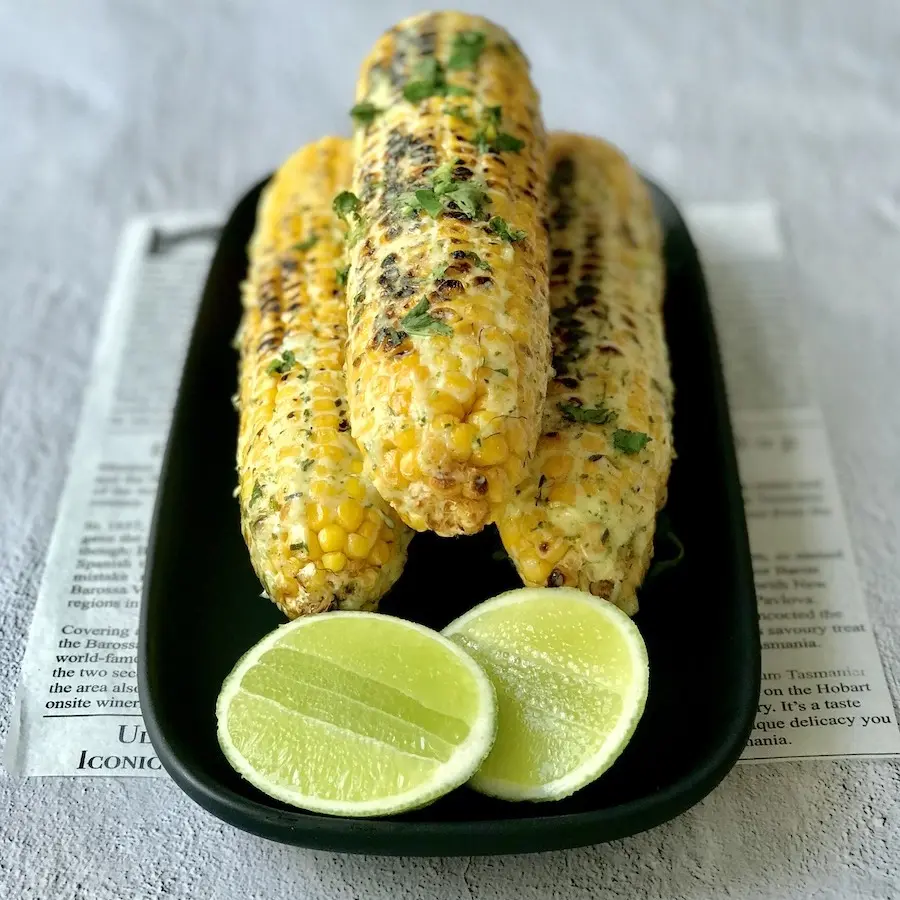
Grilled Corn

Posted on 17 Jan, 2024
Grilled Corn
  1. Remove any husk and silk from your corn cobs. Grill on the bbq or griddle pan on the stove, turning every so often so that everything cooks evenly.

While your corn is cooking, prepare the seasoned mayo.

  1. Zest the lime (keep the lime intact for later) and add to a small bowl.
  2. Remove the spine from the makrut lime leaves. Finely slice with a sharp knife then chop into fine pieces. Add to the bowl with the zest, along with the garlic and mayo. Mix to combine then season with salt to taste.
  3. When the corn is cooked, brush on the seasoned mayo and garnish with chopped coriander, finely grated Parmesan (optional) and dried chilli powder (optional).

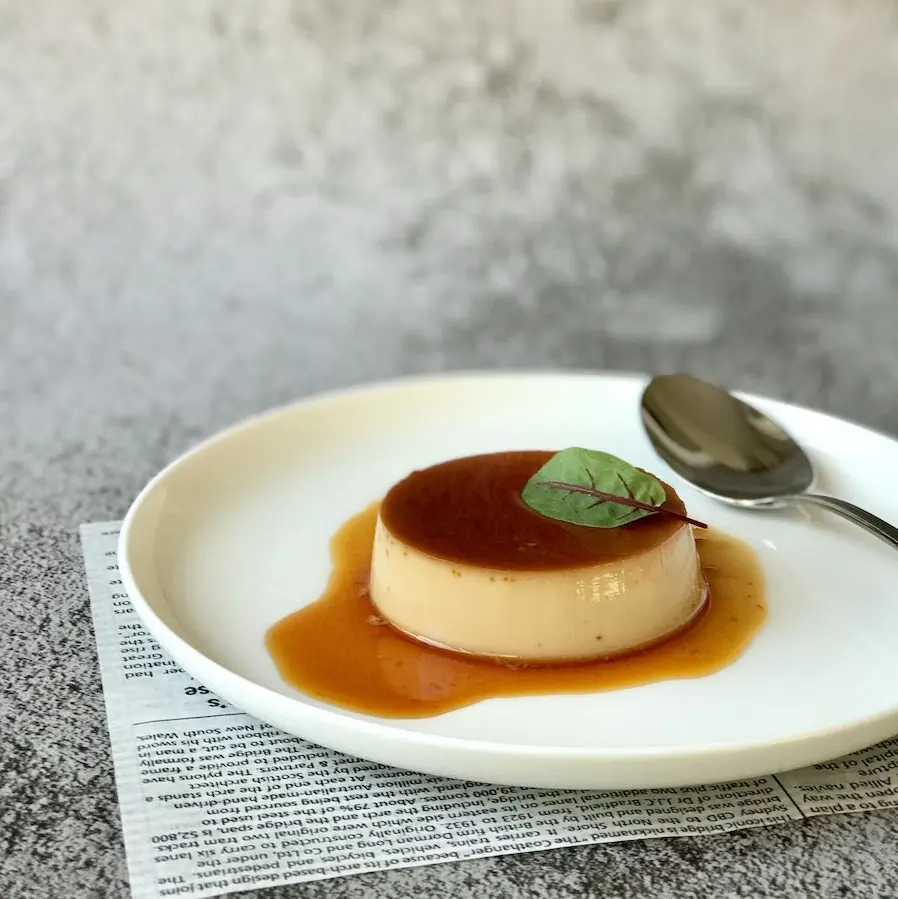
Vietnamese Coffee Flan

Posted on 10 Jan, 2024
Vietnamese Coffee Flan
  1. Preheat oven to 170C.
  2. Make the caramel by adding the sugar and water to a pan. Use a light coloured pan so that you can see the colour of your caramel develop. Heat on high and do not stir. Gently swirl the pan from time to time to disperse any dark spots forming. Your caramel is ready when it turns dark brown. Immediately pour into the bottom of your ramekins.

We used 12 x125mL capacity ramekins for this recipe.

  1. Add eggs, egg yolks, condensed milk, vanilla and salt into a large bowl. Whisk until well combined. Set aside.
  2. Heat fresh milk and coffee into a small pot to warm through (do not boil). Slowly pour this mix into your egg mix, whisking the egg mix as you pour. Pass this thin custard mix through a fine sieve into a pouring jug. Use a spoon to remove/pop any air bubbles.

Pour custard into the ramekins (not all the way to the top) and cover each ramekin with foil. Pierce holes in the foil to allow steam to escape.

  1. Place prepared ramekins into a deep baking pan. Pour hot water into the baking pan until it reaches half way up the sides of your ramekins. Bake for 25-30mins or until the custard has just set. If unsure, insert a toothpick into the centre of one flan. If it comes out clean, the flan is cooked.
  2. Take ramekins out of the baking pan and remove foil. Allow to cool on the bench top (about 30 mins) before moving them into the fridge. Allow your flans to set and chill in the fridge for at least 4 hours before turning out.
  3. To serve, run a knife around the edge of each flan before inverting onto a plate.

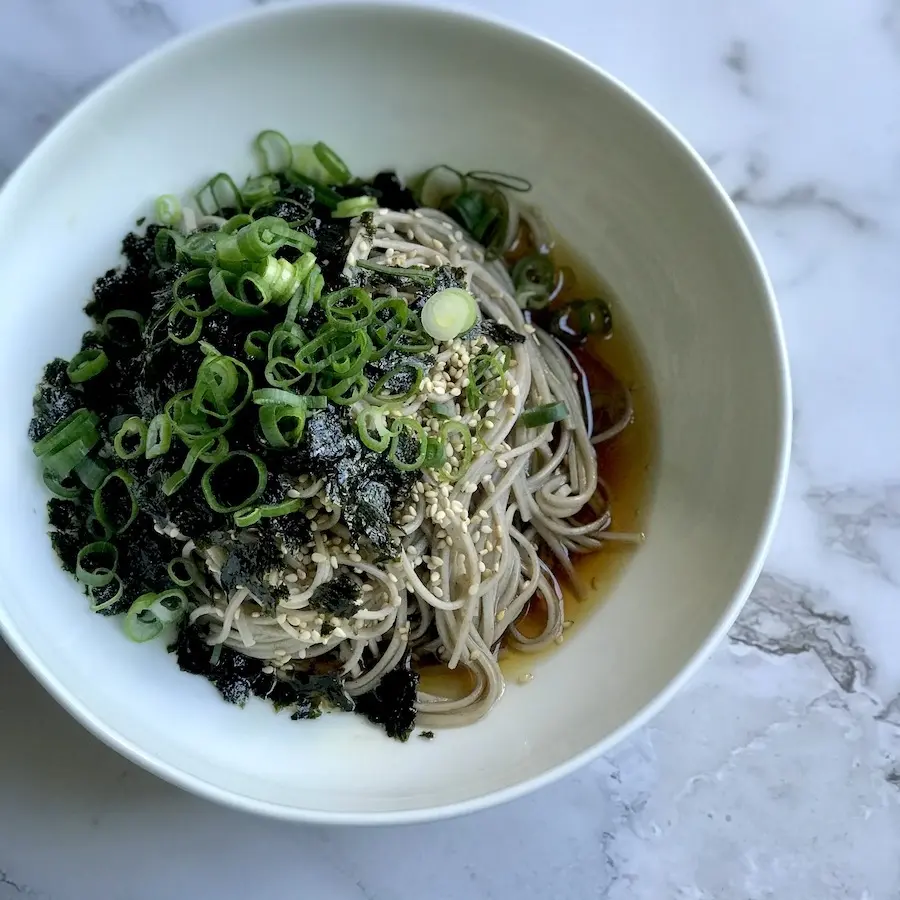
Cold Soba Noodles

Posted on 03 Jan, 2024
Cold Soba Noodles

1. Cook soba noodles according to packet

2. In a serving bowl add kombu tsuyu (a soy based seasoning liquid with a seaweed dashi base) and quality sesame oil into your serving bowl and mix. Pile on a bundle of cooked soba noodles (make sure they’re well rinsed and drained) then top with toasted sesame seeds, crushed seasoned seaweed sheets and a generous helping of sliced spring onions. 


p.s. You can always add a side of protein or veg to your noodles (we sometimes pair it with assorted vegetable tempura but kept it simple this time). 
 

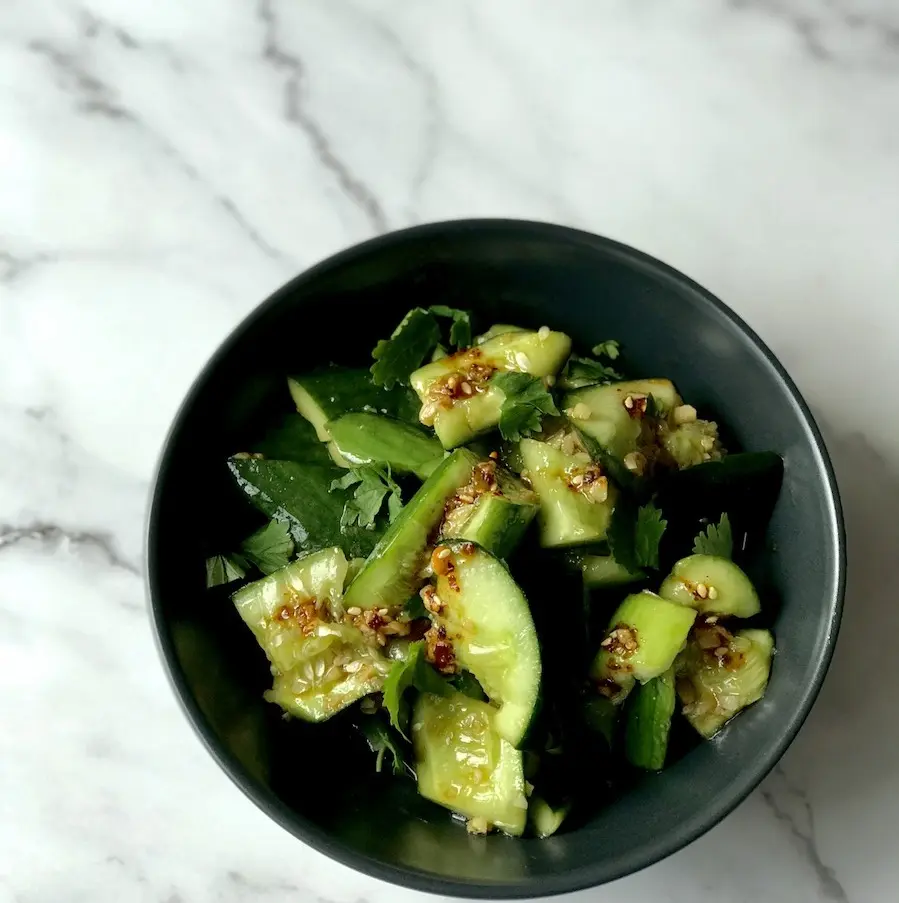
Cucumber Salad

Posted on 03 Jan, 2024
Cucumber Salad

1. Prepare your cucumber by cutting the ends off each one. Smash cucumbers with the side of a large knife/cleaver. Cut up smashed cucumber into chunks and place into a large bowl. Add salt and sugar and toss to coat. Set aside for 20mins.

2. Meanwhile, place chopped garlic into a medium sized heatproof bowl. Heat sesame oil in a dry pan until smoking. Carefully pour smoking oil onto the garlic. The hot oil will release the aroma in the garlic and help take away its raw edge/taste. Add in soy sauce, rice vinegar, Chinkiang vinegar and chilli oil to taste. Stir to mix.

3. Drain your cucumbers after 20min, leaving behind all the excess liquid. Place cucumbers in the bowl with the dressing and mix to evenly coat. Place salad in a serving bowl and garnish with fresh coriander.

Skinless Laos Sausage

Posted on 27 Dec, 2023
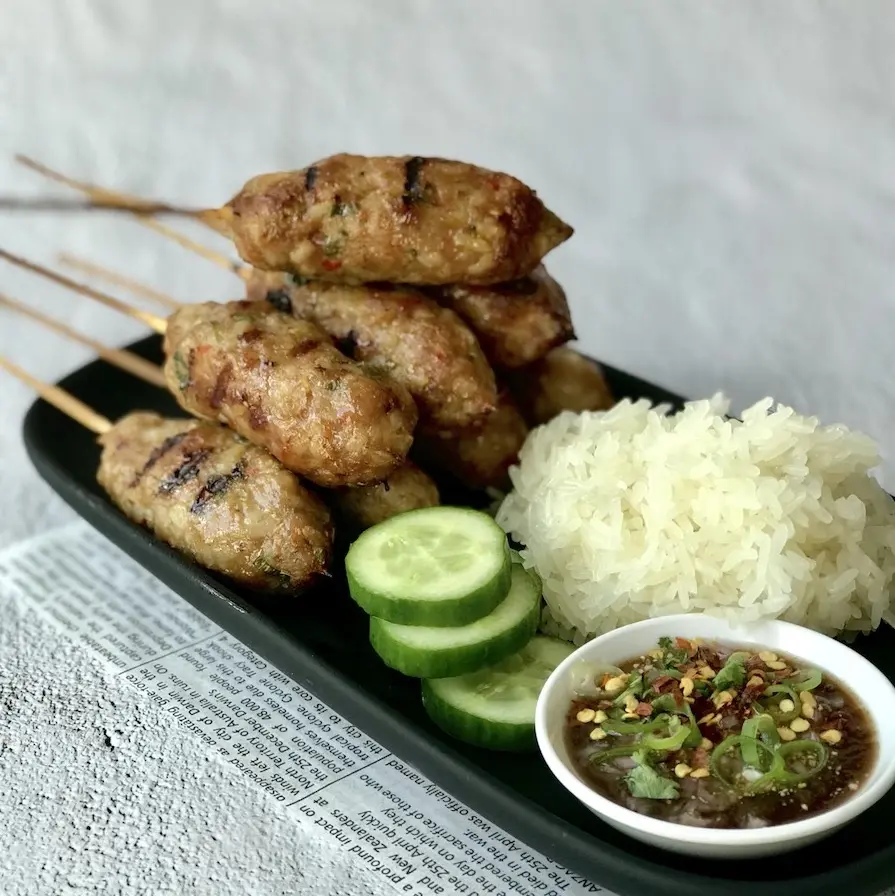
Skinless Laos Sausage
  1. Remove skins and cut galangal, shallots and lemongrass into small chunks. Add to a food processor, along with garlic, lime leaves and chilli. Pulse a few times to break up the fibres into ‘straw’. Empty mix into a large mixing bowl.
  2. Add pork mince and the rest of the ingredients into the mixing bowl. Using gloved hands, mix everything until well combined (Test the filling for seasoning by pan frying or microwaving a little nugget. Adjust if necessary by adding more fish sauce or salt to taste). Allow mx to marinate for at least 30 mins. A few hours is better.
  3. Thread mix onto skewers or shape into patties.


For best results, grill over charcoal.

You can also bake or air fry these on 210C for 15 mins followed by a quick sear on a stove top grill or pan.

Serve with nam jim jaew and sticky rice


For the Nam Jim Jaew

2 T tamarind puree

1 T palm sugar

1 T fish sauce

1 T toasted rice powder

1 T shallots, finely diced

1-2 T lime juice


4. Mix everything together until the sugar has dissolved. Garnish with sliced spring onion, chopped coriander and dried chilli flakes.

Tagged Sausage

Gochujang Buttered Noodles

Posted on 20 Dec, 2023
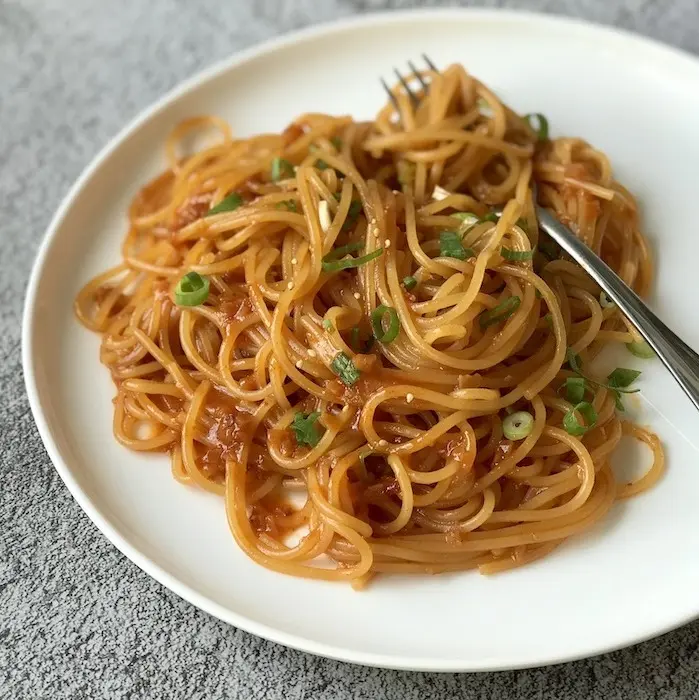
Gochujang Buttered Noodles
  1. Melt 2/3 of the butter in a large skillet and add in garlic. Season with salt. Cook until garlic starts to soften but hasn’t taken on colour.
  2. Meanwhile, cook pasta/noodles until slightly before al dente. Reserve 1 cup of the cooking water.
  3. Add gochujang, honey and vinegar to the garlic in the skillet. Stir through and bring to a simmer over med-high heat. Keep stirring the mix and continue to reduce the sauce until thickens (test by using your finger to draw a line through the sauce over the back of a spoon. The sauce is ready when the line drawn will hold and not fill back in).
  4. Add the noodles, along with some of the reserved cooking water to loosen. Toss through to coat, adding more water if necessary.
  5. Add remaining butter and toss through. Garnish with spring onions.

Serve and enjoy immediately.

Watermelon Rind Kimchi

Posted on 12 Dec, 2023
Watermelon Rind Kimchi
  1. Prepare the watermelon by cutting away all the green outer skin. Next up, cut away the watermelon flesh and save for another use. It’s ok if you leave a fine layer of flesh on the rind. Cut the rind into 1½ cm square chunks. Place prepared rind into a bowl and add salt. Mix to coat and leave for 1 hour, giving them a toss at the half way mark.
  2. After this time, your rinds will have released a lot of liquid. Drain the juice and rinse the rinds a couple of times with cold, running water. Squeeze out all the excess water. Add rinds to a mixing bowl, along with the rest of the ingredients. With gloved hands, mix until everything is well combined. You can gently massage the rinds with the seasonings to ensure that they are well coated.

Serve this kimchi immediately, or store in a sterilised glass jar in the fridge to enjoy the next day when the rinds have had a chance to develop more flavour. This kimchi is best eaten within a couple of days.

Korean Corn Cheese

Posted on 12 Dec, 2023
Korean Corn Cheese
  1. Preheat grill to very hot (maximum heat).
  2. Add corn, onion, mayo, sugar, and salt into a bowl and mix to combine.
  3. Melt butter in a small 8” cast iron skillet (or any stove to oven safe vessel) on the stove. Add corn mix and stir to heat through or until it starts to bubble. Turn off heat. Add half of the mozzarella and stir through. Sprinkle the rest of the mozzarella on top of corn mix.
  4. Place skillet under a hot grill to cook until the cheese has melted.
  5. Serve immediately.

Mango Sticky Rice

Posted on 05 Dec, 2023
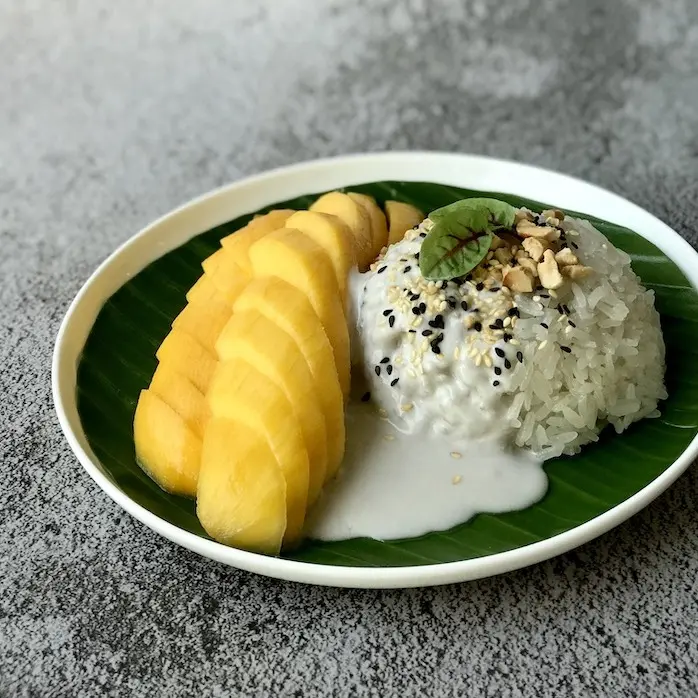
Mango Sticky Rice
  1. Add rice to a large bowl and fill with tap water. Leave to soak overnight.
  2. The next day, drain and rinse the rice under cold running water. Line a steamer basket with baking paper then fill with drained rice. Steam for 30 mins.
  3. Add 85mL coconut milk, caster sugar and salt into a large bowl. Mix to dissolve the sugar then add to the freshly steamed rice. Mix until everything is well combined then set aside for about an hour for the coconut milk to absorb into the rice.
  4. Meanwhile, make the coconut sauce by adding 315mL coconut milk, sugar and salt to a small pot.
  5. Tie the pandan leaf into a knot and add to the pot. Heat to dissolve the sugar. Simmer for 5 minutes then remove from the heat. Remove and discard the pandan leaf.
  6. Peel your mangoes then cut 2 mango cheeks from each mango. Place each cheek flat onto your cutting board and slice into a more bite sized pieces.
  7. Spoon a mound of sticky rice onto each serving plate. Place one cheek of mango next to each mound. Drizzle on coconut sauce and garnish with toasted peanuts and sesame seeds.

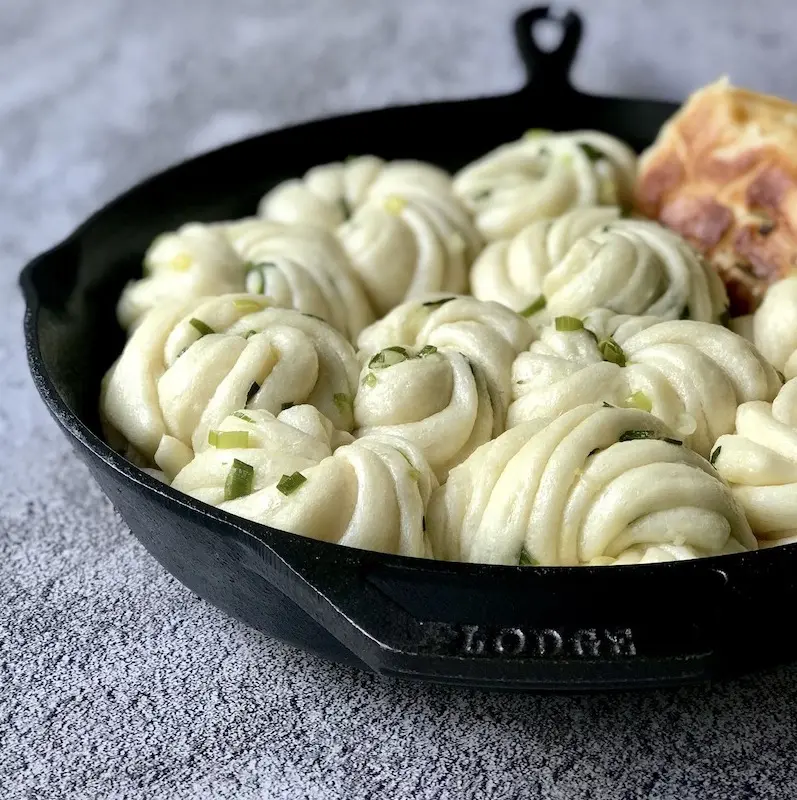
Chinese Flower Buns (Hua Juan)

Posted on 29 Nov, 2023
Chinese Flower Buns (Hua Juan)

Prepare the Dough and Oil

1. Add yeast, sugar and 250mL water to bowl and mix to combine. Leave for 10 mins until bubbles form.

2. Meanwhile, add the flour to the bowl of your stand mixer fitted with the dough hook attachment. Make a well in the centre and pour in the yeast mixture. Mix on the lowest speed for 10 minutes. Form dough into a ball and place in an oiled bowl. Cover and set aside for 2 hours.

3. Meanwhile, make the oil filling. Add the spring onions, Chinese five spice and salt into a heat proof bowl. Heat oil in a small pot/pan until smoking then pour into the bowl. Carefully mix to distribute flavours and set aside to cool completely.

4. After 2 hours, turn your dough onto a lightly floured work surface. Roll it out to approx. 2cm thickness. Dissolve baking powder and 2 tsp water in a small bowl then pour into the centre of the dough. Fold in the sides and knead through for about 2 mins or until smooth.

Shape the Dough

5. Roll dough into a large 20cm x 30cm rectangle. Brush on the seasoned oil mix (you may not need all of it. Gently mark the dough to divide it into three long strips. Fold the end pieces of the dough into the centre along the marked lines. You should end up with 3 layers of dough, stacked/folded on top of each other. Cut into 12 slices.  

6. Take one strip. Using a chopstick, press down along the length/centre of the strip. Stretch the strip to double in length. Drape the strip of dough over the chopstick. Pinch the enda closed with one hand while twisting the dough with the chopstick in the other. Place the twisted dough over the punched ends to cover. Lightly press down with your chopstick and slide it out. Repeat to shape the remaining buns

Cook the Buns

7. Heat 1-2T oil into a large 12” cast iron/non-stick skillet. Place in rolls. When the rolls start to brown, add in 200mL water. Cover with a lid and allow buns to steam on med heat until all the water has almost evaporated. Uncover and allow the water to fully evaporate and the buns to take on more colour for another minute or so.

Serve warm.
Korean Braised Chicken (Jjimdak)

Posted on 21 Nov, 2023
Korean Braised Chicken (Jjimdak)

1. Soak noodles in warm water for 30 mins.

2. Cut chicken into smaller pieces, leaving in the bone.

3. Cut potatoes into large chunks and soak in water until needed.

4. Cut carrot into large even pieces. Cut onion into large chunks. Slice mushrooms in half.

5. Put chicken pieces in a large pot. Add in water and braising liquid and bring to the boil, then allow to boil for 10 mins whilst removing all surface scum.

6. Reduce the heat and simmer for another 10 mins.

7. Add the potatoes (drained), carrots, mushrooms, onion, dried chillies, garlic and ginger. Cover and cook for 15 mins.

8. Drain noodles and add into the pot. Cook for 3 mins.

9. Add in sesame oil and spring onions and stir through. Turn off the heat and garnish with sesame seeds.

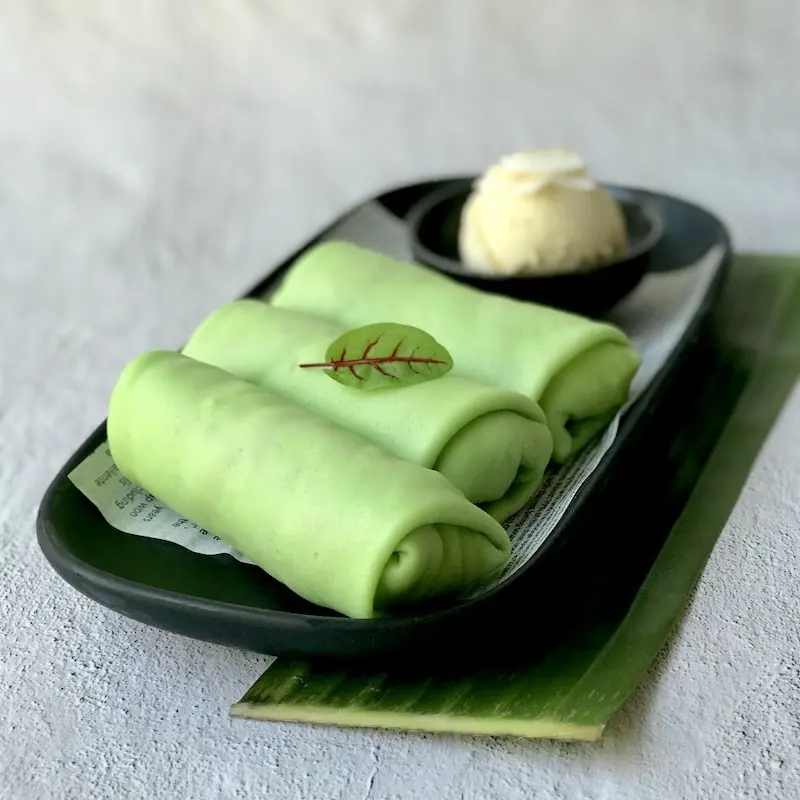
Pandan Crepes

Posted on 14 Oct, 2023
Pandan Crepes
  1. Add flour and salt into a large bowl. Add in milk and whisk to combine. Add in whisked eggs and butter and mix together to arrive at a smooth batter. If there are lumps in your batter, it is better to strain it through a sieve rather than over working your batter to try and remove them. Set aside for 30 minutes.
  2. Heat a non-stick pan and add 1 tsp butter. Swirl the butter around the pan to coat then wipe off with kitchen paper.
  3. Pour enough batter into the pan to lightly coat the bottom. Allow the crepe to cook on low heat until the batter turns completely opaque and is cooked through. There’s no need to flip it. Once the crepe is cooked, it will slide around the pan and release. Slide the crepe onto a plate and continue making your crepes until all the batter is used up. There is no need to butter your pan after the first crepe. Stack crepes flat on top of each other as you are cooking them.
  4. Allow crepes to cool before filling/assembling.
Tagged sweets, crepe, pancake

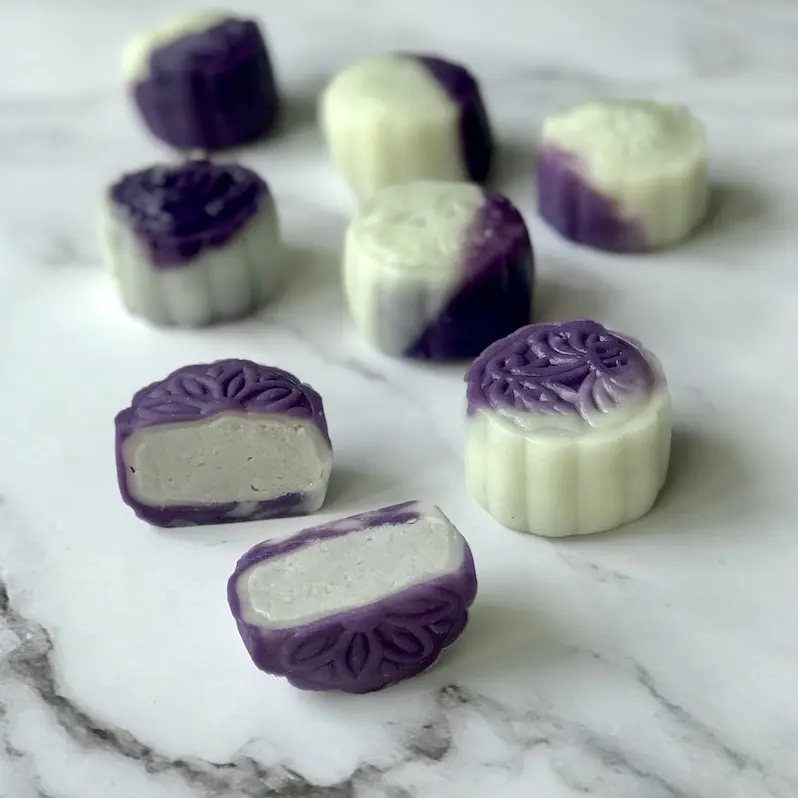
Taro Snow Skin Mooncake

Posted on 27 Sep, 2023
Taro Snow Skin Mooncake

Part A. Make the Filling

200g frozen taro, thawed & cut into 2cm chunks
70g caster sugar
2T cornflour
2T coconut milk
1T cornflour

1. Steam taro for 30mins or until fully cooked through.

2. Place cooked taro in a med bowl and mash. Add the rest of the ingredients and mix together. Push through a fine sieve to remove any lumps.

3. Cover with cling film and place in the fridge to chill and set.


Part B. Make the Snow Skin

40g glutinous rice flour
40g rice flour
20g wheat starch
20g caster sugar
150g full cream milk


20g canola oil
A drop of ube/purple food colouring

4. Add flours, wheat statch, sugar and milk into a heatproof bowl. Whisk until smooth then cover the bowl with cling film. Steam for 20mins or until the centre is fully set.

5. Remove bowl from the steamer and discard the cling film. Add in oil and carefully work it into the mix.

6. Break off 1/3 of the dough and add food colouring. Knead the colour through then divide into 10 even portions. Divide the white dough into 10 even portions.

7. Pair one portion of purple dough with one portion of white dough. Continue until you have 10 pairs of purple and white dough. Cover with cling film and allow to cool completely.


Part C. Make the Snow Skin Mooncakes

8. Divide the prepared taro filling into 10 equal portions and form into balls.

9. Grab one blue and white dough combo. Form into a ball and roll into a disc. Wrap the disc around a taro ball and seal completely. Shape using the mooncake mould. You can use a little cornflour if you’re finding the dough a little sticky.

These mooncakes are best enjoyed on the day they are made.

PS: If you don’t have mooncake moulds, you can just present these sweet treats as taro and coconut filled mochi balls! Go one step further if you want to unleash you inner creative skills … shape the mochi balls into cute figurines like bunnies, kittens, hedgehogs etc by using a small pair of pointed sharp scissors to snip in ears and spines.


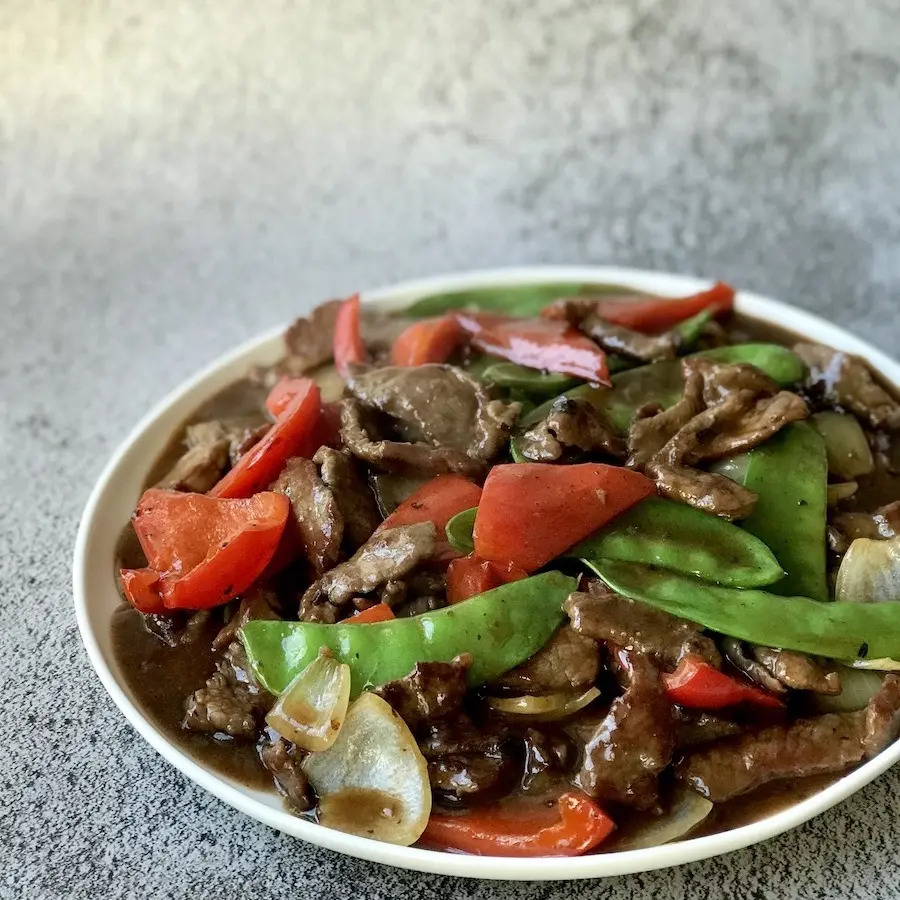
Beef & Black Bean Sauce

Posted on 19 Sep, 2023
Beef & Black Bean Sauce

Prepare the beef

1. Add beef, baking soda and water into a bowl. Using a gloved hand, massage the beef until all the liquid has been absorbed, then set aside for 1 hour* if using rump. If using chuck** set aside for 2 hours

2. After an hour, rinse the beef under running water until the water runs clear. Pat dry with kitchen paper. Add beef into a new bowl, together with the rest of the ingredients. Leave to marinate overnight in the fridge.

Prepare the sauce

3. Add all ingredients into a bowl. Mix then set aside.

Time for the Stir Fry

4. Heat a wok or large skillet until very hot. Add 1T oil then half of the beef. Separate the beef and cook in one layer. When both sides are seared, remove and set aside. Continue to cook the second batch and set aside.

6. Reduce the heat to med-high. Add oil then onions and red capsicum. Stir fry quickly then add Shaoxing wine. Add in the prepared sauce and bring it to a simmer.

7. Return the beef to the wok then add snow peas. Stir then bring back to a simmer. Taste for seasoning then add cornflour slurry (mix cornflour and water together in a small bowl), stirring as you go. Serve up once your sauce has thickened.


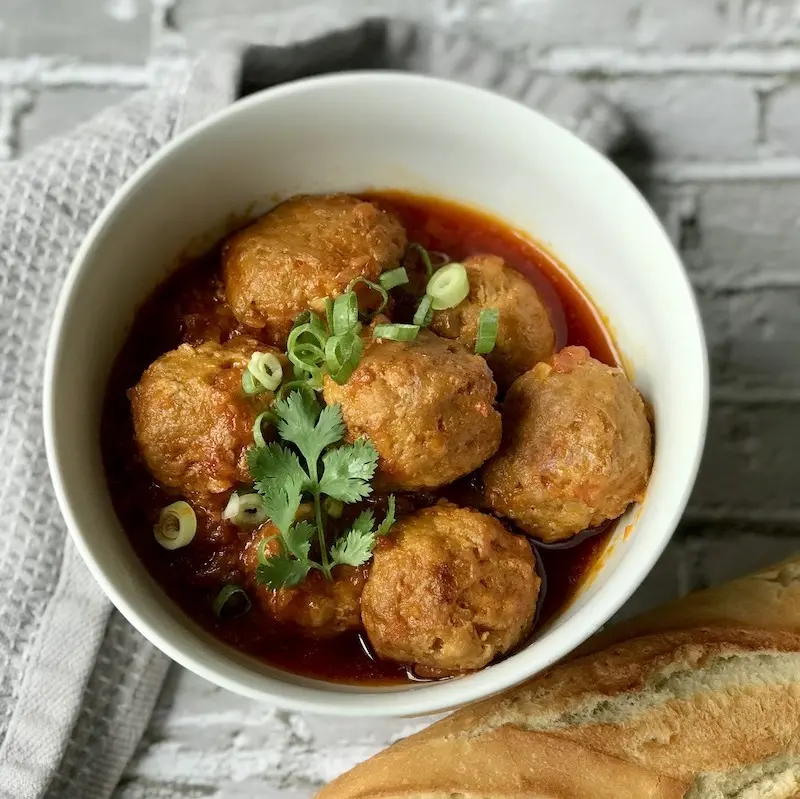
Xiu Mai (Vietnamese Meatballs)

Posted on 11 Sep, 2023
Xiu Mai (Vietnamese Meatballs)
  1. Add all meatball ingredients into a medium sized bowl and mix well. Cover and chill for 30mins.
  2. Form 25 meatballs from your marinated mince (I used a ¼cup ice cream scoop do this quickly). Place meatballs on heatproof plates then steam for 10 minutes. Make sure you keep the juices collected at the bottom of your plates.
  3. To make the sauce, heat 3T oil in a deep large skillet or wok. Add annatto seeds and stir to release their colour. This will only take a minute or two. Be careful not to burn your seeds. Turn off the heat, remove the seeds and discard.
  4. Heat the vibrantly coloured oil in the wok and add the onions. Sweat down the onions on medium heat then add garlic. When the garlic is fragrant, add tomato paste and saute for 30 secs. Add tomato sauce and fish sauce and saute for 30 secs. Add chopped tomatoes and mix through before adding back the steamed meatballs into the sauce. Pour in all of the steaming liquid. Cover and simmer on low for about 20 mins.
  5. Season to taste, garnish with spring onion and coriander, then enjoy!