Help & Support 02 9161 8036
Welcome Guest

Recipes: snack

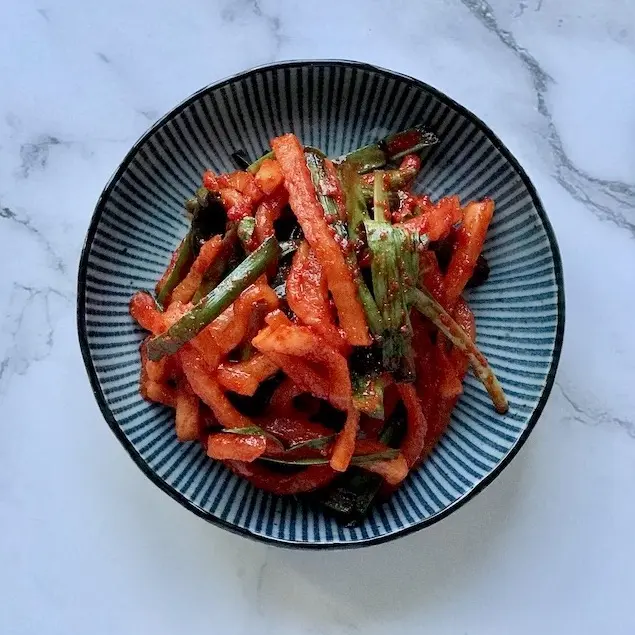
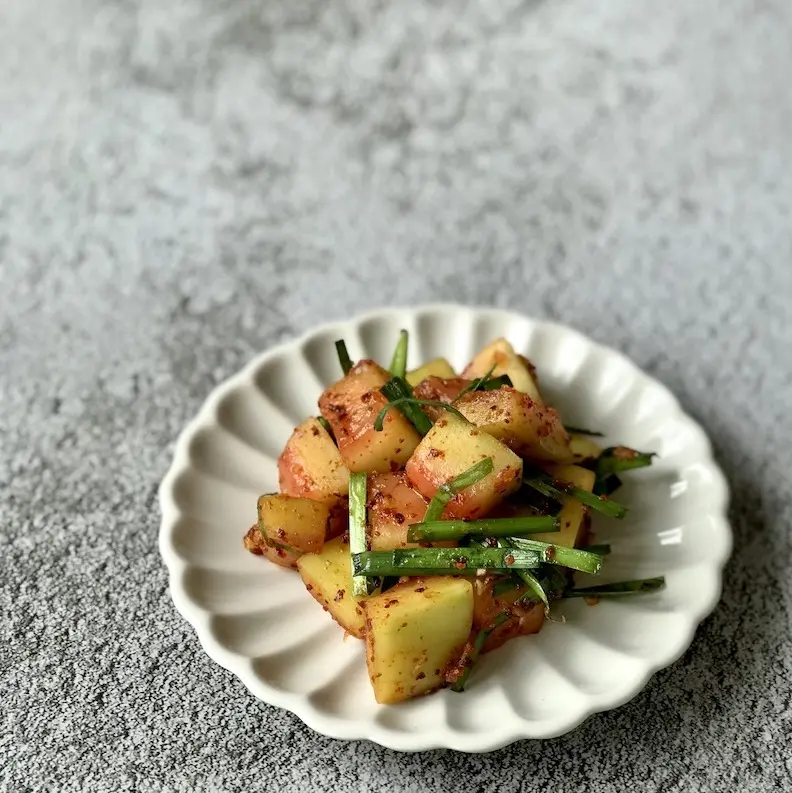
Quick Radish Kimchi

Posted on 06 Mar, 2024
Quick Radish Kimchi
  1. Slice thin rounds from your radish. Stack the rounds then slice into thick match sticks. Add sugar, water and vinegar and mix to combine. Set aside for 30mins. After this time, your radish would have released a lot of liquid. Strain away this liquid and press through a clean tea towel to remove any excess moisture.
  2. Add 1T gochu garu and mix with a gloved hand to coat all the radish pieces.
  3. In another bowl, mix together 1T sugar, 1T fish sauce, minced garlic and remaining gochu garu.
  4. Add spring onions, garlic chives and prepared radish. Mix everything well together and serve.

Tonkatsu

Posted on 15 Feb, 2024
Tonkatsu

Serves 2-4

  1. Place a piece of parchment paper over one piece of pork and tenderise using a rolling pin or food mallet. Repeat to tenderise all pieces.
  2. Finely grate one brown onion into a bowl. Smother each piece of pork in this onion puree and refrigerate overnight. This injects so much flavour into the meat!
  3. Just before cooking, set up your crumbing station with 3 shallow bowls:
  • 1 bowl filled with the AP flour
  • 1 bowl filled with beaten eggs (heavily seasoned with salt & pepper and a dash of vanilla extract)
  • 1 bowl filled with panko breadcrumbs
  1. remove all the excess onion puree from each piece of pork and lightly dust them in AP flour.
  2. Slide each piece of pork (one at a time) into the bowl of beaten eggs. This egg mix will allow the crunchy coating to stick to your pork.
  3. Coat each piece of pork with panko breadcrumbs. Gently press in the crumbs with your fingers to cover the entire surface area of each piece of pork.
  4. Heat a wok, deep fryer or deep skillet to 180C (355F). Ensure that there is enough oil to fully submerge each piece of pork, leaving enough room for the oil level to rise in wok/skillet when you add in the pork pieces.
  5. Deep fry your crumbed pork pieces in batches  (no more than two at a time) turning each piece over so that all sides are golden. Because each piece of meat is thin, it doesn't take long for each piece to cook.
  6. Drain on a cooling rack lined with a sheet of paper towel. The rack helps air circulate under the tonkatsu and keeps it crunchy longer.

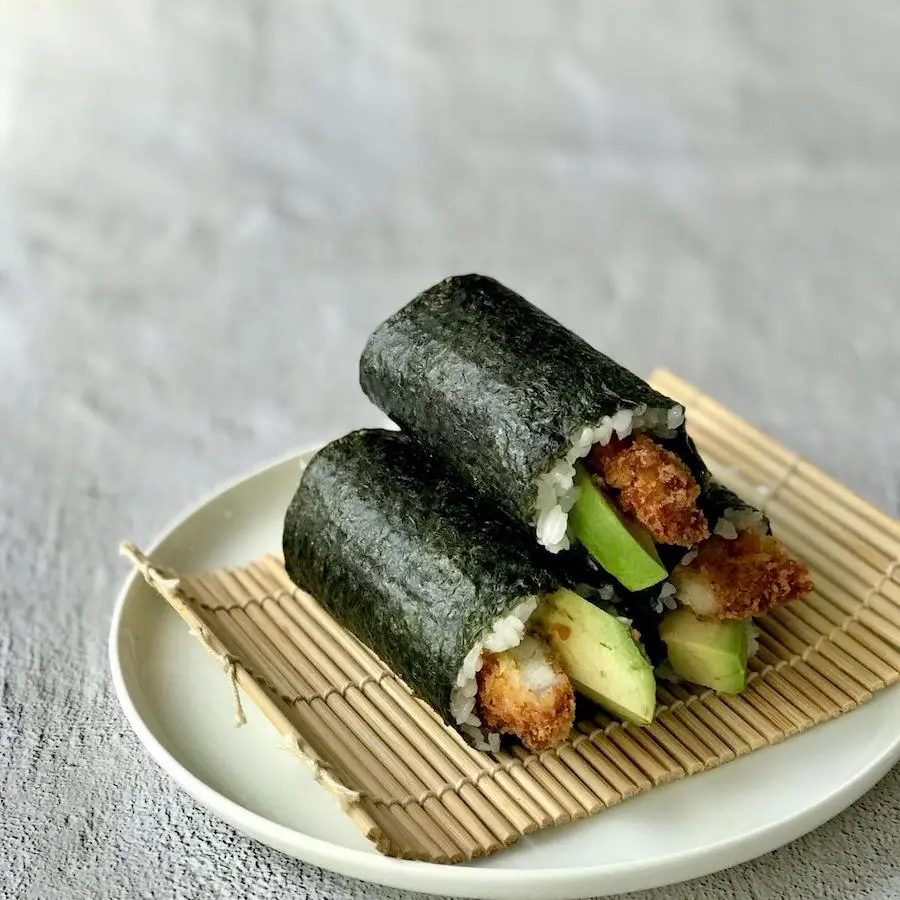
Use the tonkatsu as you please. Over a bowl of piping hot ramen or roll it into a sushi and pack it for a delicious lunch.

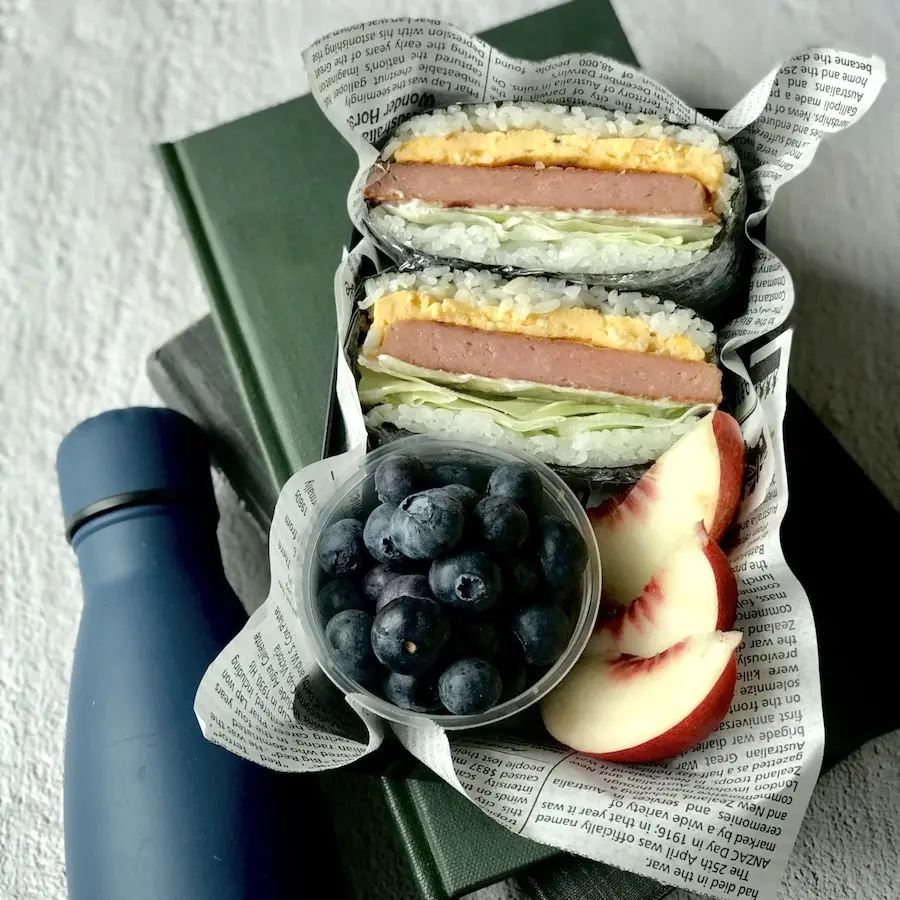
Spam Onigirazu

Posted on 15 Feb, 2024
Spam Onigirazu

Makes 6


1. Wash and cook your rice.

2. While your rice is cooking, prepare the filling:

  • Slice SPAM into 6 thick slices. Heat up a large skillet with 1tsp oil. Add SPAM slices and pan fry until each side is golden. Drain on kitchen paper and set aside.
  • Crack eggs into a bowl and add a dash of milk/water. Season with salt and pepper and whisk well to combine. Heat up a non-stick skillet with 1tsp oil. Pour in egg mix and make one omelette. Slide omelette onto a chopping board and slice into 6 portions.

3. Once cooked, transfer the rice to a large bowl and mix in sushi seasoning to taste. Divide the rice mix into 12 portions.


To make each onigirazu:

  1. Place a large sheet of cling film down on your bench.
  2. Place one sheet of nori on top of your piece of plastic.
  3. Place one portion of seasoned rice in the centre of the nori. Flatten it down to make a small square, rotated 45 degrees to the direction of your piece of nori. The rice acts like the bread in a sandwich.
  4. Add a piece of omelette on the centre of your rice.
  5. Add a piece of SPAM on the centre of your omelette.
  6. Squeeze on Kewpie mayo to taste.
  7. Tear up ½ a lettuce leaf to fit your rice square and layer on top of the mayo.
  8. Grab another portion of seasoned rice and compact it in your hand before placing on top of the lettuce.
  9. Fold each corner of nori over your ‘sushi sandwich’ to completely wrap your sandwich.
  10. Wrap the cling film around your nori parcel so that it stays firmly in shape.
  11. Allow your onigirazu to sit for 10 minutes to help set it before slicing in half.


Repeat with remaining ingredients to make the other 5 onigirazu.

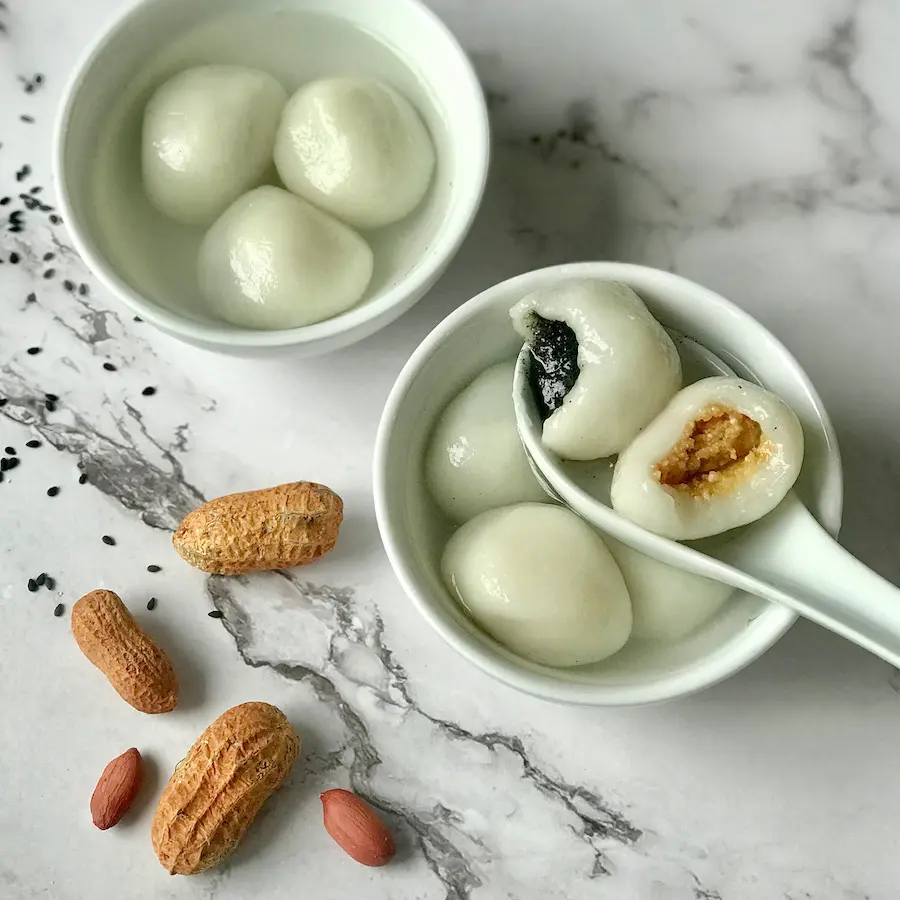
Tang Yuan

Posted on 08 Feb, 2024
Tang Yuan

Prepare the Black Sesame Filling

  1. Toast the sesame seeds in a dry pan for 5-8 mins on medium-low heat, stirring continuously until fragrant. Cool completely before adding to a food processor. Blitz to grind seeds to a paste. Add sugar and pulse to combine. Add butter and pulse to combine. Place filling in a bowl, cover and chill for 30 mins to harden.
  2. Once the filling is chilled, you will be able to portion it into little 5g balls. If the balls are too soft, return them the fridge for another 10-20 mins to set before continuing. 

Prepare the Peanut Filling

  1. Toast the peanuts in a dry pan for 3-5 mins on medium-low heat, stirring continuously until fragrant. Allow to cool completely. I like to pound my peanuts using a mortar and pestle until they resemble rough sand. Add sugar and mix through. Add butter and mix through. Place filling in a bowl, cover and chill for 30 mins to harden.
  2. Once the filling is chilled, you will be able to portion it into little 5g balls. If the balls are too soft, return them the fridge for another 10-20 mins to set before continuing. 

Prepare the Dough

  1. Add glutinous rice flour and potato starch in a bowl. Slowly add in the water, stirring as you go until a smooth ball is formed. You may not need all the water.
  2. Break off 12-13g balls from your dough. Make rice balls one at a time, flattening the dough ball into a disc, placing a ball of filling in the middle then enclosing the dough over the filling. Roll the ball in your hands until it’s round and smooth. Set aside while you make the rest of the balls.

You can freeze the balls at this stage (do not allow them to touch) and cook them at a later stage.

Prepare the Sugar Syrup

  1. Add sugar, water and ginger slices to a large bowl. Bring to the boil, stirring to melt the sugar. Once the syrup starts to boil, reduce the heat to low until it is ready to receive the rice balls.

Cook the Tang Yuan

  1. Bring a large pot of water to the boil. Cook your tang yuan in batches by slowly adding into the boiling water. Carefully nudge them so that they don’t stick to the bottom of the pot and to each other. After one minute, remove them with a slotted spoon and transfer them directly into the simmering sugar syrup. Cook for a further minute or until they rise to the top.

Serve tang yuan warm in a bowl partly filled with the sugar syrup.

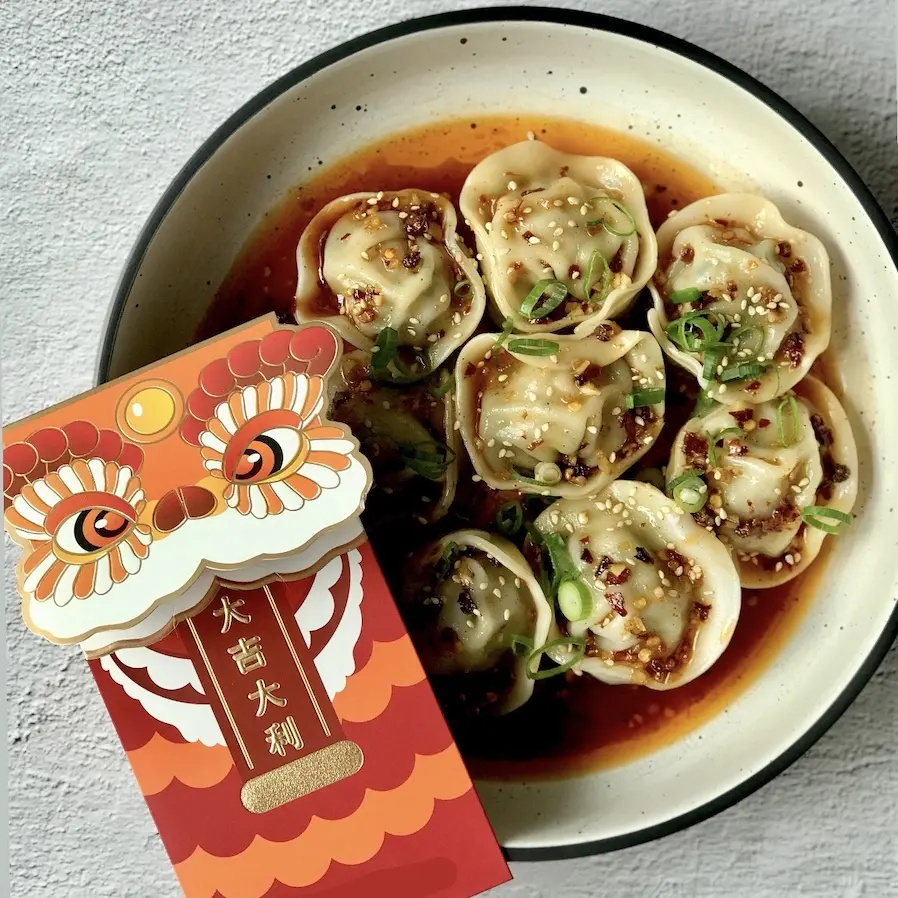
Dumplings in Chilli Oil

Posted on 07 Feb, 2024
Dumplings in Chilli Oil

Serves 30-50

Make the Dumplings

  1. Add dumpling filling into a bowl and mix until well incorporated. Fill dumplings using store bought wrappers, sealing them with a bit of water. You can make these ahead and freeze in one layer (do not allow them to touch each other). Cook them directly from frozen (do not thaw).
  2. To cook, bring a large pot of water to the boil. When it’s at a raging boil, add dumplings and cook in batches, for 5-6mins each batch, or until the dumplings are cooked through.
  3. Remove dumplings with a slotted spoon/spider and place directly into the prepared sauce. Toss to coat then garnish with sliced spring onion and toasted sesame seeds.

Make the Chilli Oil Sauce

  1. In a large shallow bowl, add garlic, sugar, Chinese five spice, chicken powder and Szechuan peppercorns in the centre.
  2. Heat oil to smoking point then pour over the garlic mix to release the flavours. Give everything a stir then add the rest of the ingredients and mix through. Set aside.

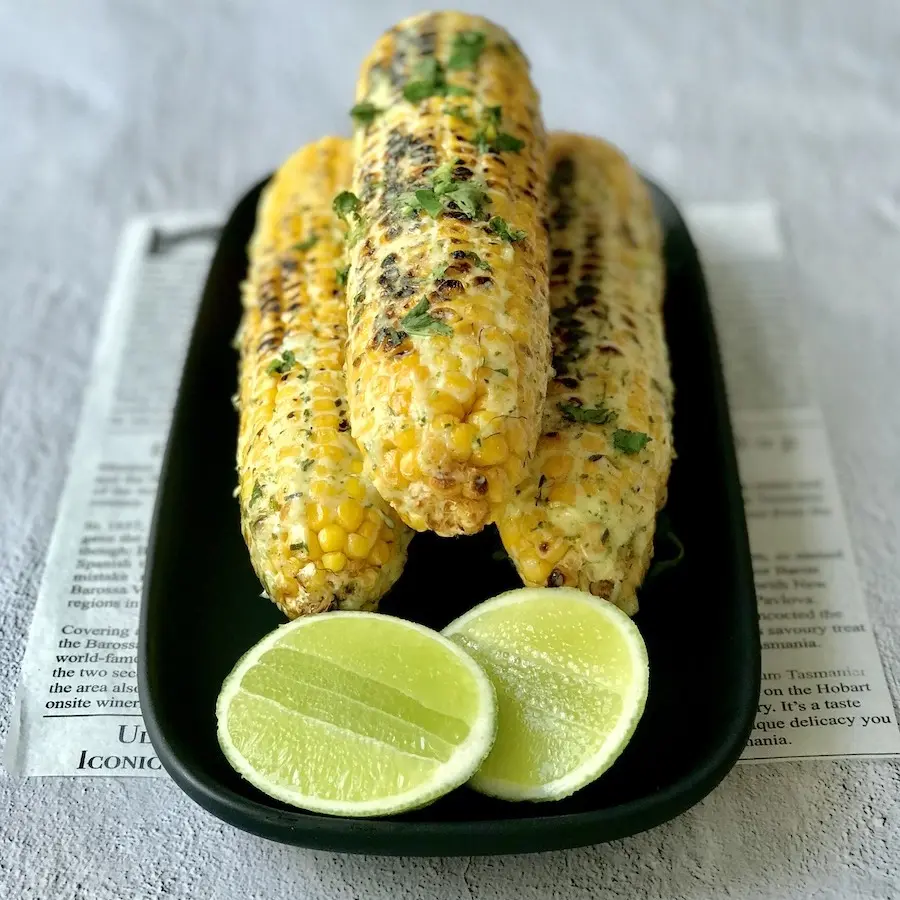
Grilled Corn

Posted on 17 Jan, 2024
Grilled Corn
  1. Remove any husk and silk from your corn cobs. Grill on the bbq or griddle pan on the stove, turning every so often so that everything cooks evenly.

While your corn is cooking, prepare the seasoned mayo.

  1. Zest the lime (keep the lime intact for later) and add to a small bowl.
  2. Remove the spine from the makrut lime leaves. Finely slice with a sharp knife then chop into fine pieces. Add to the bowl with the zest, along with the garlic and mayo. Mix to combine then season with salt to taste.
  3. When the corn is cooked, brush on the seasoned mayo and garnish with chopped coriander, finely grated Parmesan (optional) and dried chilli powder (optional).

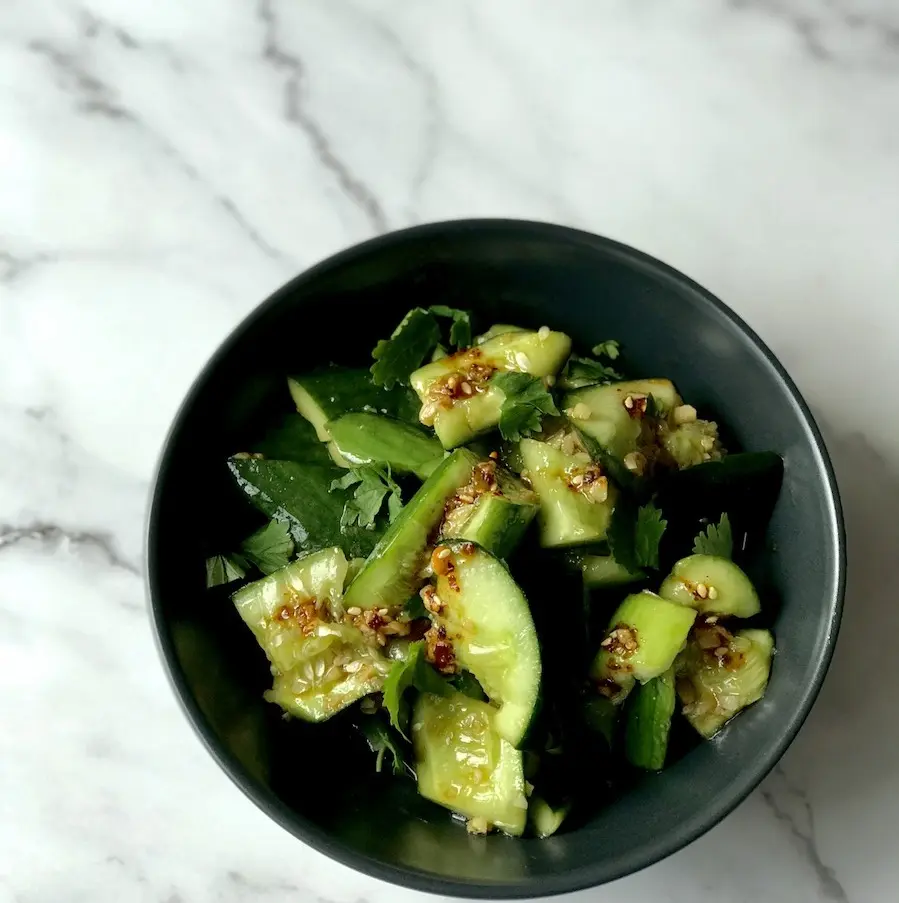
Cucumber Salad

Posted on 03 Jan, 2024
Cucumber Salad

1. Prepare your cucumber by cutting the ends off each one. Smash cucumbers with the side of a large knife/cleaver. Cut up smashed cucumber into chunks and place into a large bowl. Add salt and sugar and toss to coat. Set aside for 20mins.

2. Meanwhile, place chopped garlic into a medium sized heatproof bowl. Heat sesame oil in a dry pan until smoking. Carefully pour smoking oil onto the garlic. The hot oil will release the aroma in the garlic and help take away its raw edge/taste. Add in soy sauce, rice vinegar, Chinkiang vinegar and chilli oil to taste. Stir to mix.

3. Drain your cucumbers after 20min, leaving behind all the excess liquid. Place cucumbers in the bowl with the dressing and mix to evenly coat. Place salad in a serving bowl and garnish with fresh coriander.

Watermelon Rind Kimchi

Posted on 12 Dec, 2023
Watermelon Rind Kimchi
  1. Prepare the watermelon by cutting away all the green outer skin. Next up, cut away the watermelon flesh and save for another use. It’s ok if you leave a fine layer of flesh on the rind. Cut the rind into 1½ cm square chunks. Place prepared rind into a bowl and add salt. Mix to coat and leave for 1 hour, giving them a toss at the half way mark.
  2. After this time, your rinds will have released a lot of liquid. Drain the juice and rinse the rinds a couple of times with cold, running water. Squeeze out all the excess water. Add rinds to a mixing bowl, along with the rest of the ingredients. With gloved hands, mix until everything is well combined. You can gently massage the rinds with the seasonings to ensure that they are well coated.

Serve this kimchi immediately, or store in a sterilised glass jar in the fridge to enjoy the next day when the rinds have had a chance to develop more flavour. This kimchi is best eaten within a couple of days.

Korean Corn Cheese

Posted on 12 Dec, 2023
Korean Corn Cheese
  1. Preheat grill to very hot (maximum heat).
  2. Add corn, onion, mayo, sugar, and salt into a bowl and mix to combine.
  3. Melt butter in a small 8” cast iron skillet (or any stove to oven safe vessel) on the stove. Add corn mix and stir to heat through or until it starts to bubble. Turn off heat. Add half of the mozzarella and stir through. Sprinkle the rest of the mozzarella on top of corn mix.
  4. Place skillet under a hot grill to cook until the cheese has melted.
  5. Serve immediately.

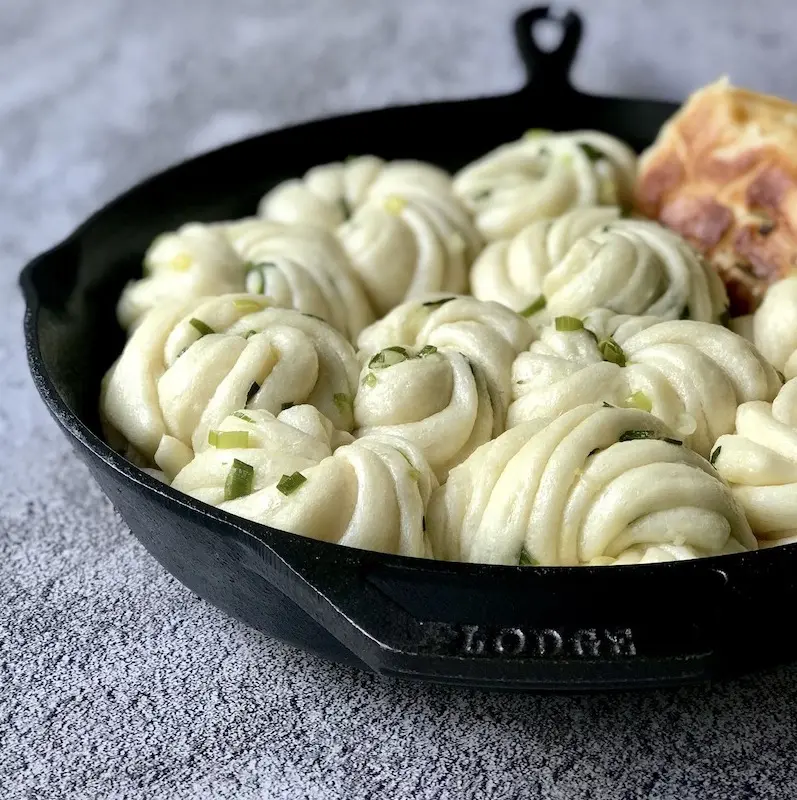
Chinese Flower Buns (Hua Juan)

Posted on 29 Nov, 2023
Chinese Flower Buns (Hua Juan)

Prepare the Dough and Oil

1. Add yeast, sugar and 250mL water to bowl and mix to combine. Leave for 10 mins until bubbles form.

2. Meanwhile, add the flour to the bowl of your stand mixer fitted with the dough hook attachment. Make a well in the centre and pour in the yeast mixture. Mix on the lowest speed for 10 minutes. Form dough into a ball and place in an oiled bowl. Cover and set aside for 2 hours.

3. Meanwhile, make the oil filling. Add the spring onions, Chinese five spice and salt into a heat proof bowl. Heat oil in a small pot/pan until smoking then pour into the bowl. Carefully mix to distribute flavours and set aside to cool completely.

4. After 2 hours, turn your dough onto a lightly floured work surface. Roll it out to approx. 2cm thickness. Dissolve baking powder and 2 tsp water in a small bowl then pour into the centre of the dough. Fold in the sides and knead through for about 2 mins or until smooth.

Shape the Dough

5. Roll dough into a large 20cm x 30cm rectangle. Brush on the seasoned oil mix (you may not need all of it. Gently mark the dough to divide it into three long strips. Fold the end pieces of the dough into the centre along the marked lines. You should end up with 3 layers of dough, stacked/folded on top of each other. Cut into 12 slices.  

6. Take one strip. Using a chopstick, press down along the length/centre of the strip. Stretch the strip to double in length. Drape the strip of dough over the chopstick. Pinch the enda closed with one hand while twisting the dough with the chopstick in the other. Place the twisted dough over the punched ends to cover. Lightly press down with your chopstick and slide it out. Repeat to shape the remaining buns

Cook the Buns

7. Heat 1-2T oil into a large 12” cast iron/non-stick skillet. Place in rolls. When the rolls start to brown, add in 200mL water. Cover with a lid and allow buns to steam on med heat until all the water has almost evaporated. Uncover and allow the water to fully evaporate and the buns to take on more colour for another minute or so.

Serve warm.

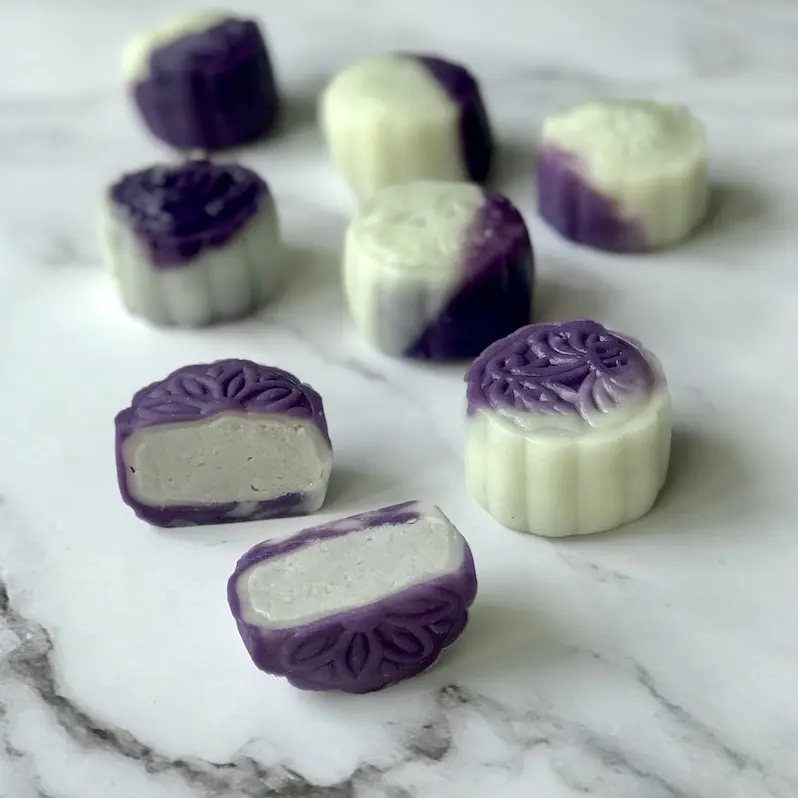
Taro Snow Skin Mooncake

Posted on 27 Sep, 2023
Taro Snow Skin Mooncake

Part A. Make the Filling

200g frozen taro, thawed & cut into 2cm chunks
70g caster sugar
2T cornflour
2T coconut milk
1T cornflour

1. Steam taro for 30mins or until fully cooked through.

2. Place cooked taro in a med bowl and mash. Add the rest of the ingredients and mix together. Push through a fine sieve to remove any lumps.

3. Cover with cling film and place in the fridge to chill and set.


Part B. Make the Snow Skin

40g glutinous rice flour
40g rice flour
20g wheat starch
20g caster sugar
150g full cream milk


20g canola oil
A drop of ube/purple food colouring

4. Add flours, wheat statch, sugar and milk into a heatproof bowl. Whisk until smooth then cover the bowl with cling film. Steam for 20mins or until the centre is fully set.

5. Remove bowl from the steamer and discard the cling film. Add in oil and carefully work it into the mix.

6. Break off 1/3 of the dough and add food colouring. Knead the colour through then divide into 10 even portions. Divide the white dough into 10 even portions.

7. Pair one portion of purple dough with one portion of white dough. Continue until you have 10 pairs of purple and white dough. Cover with cling film and allow to cool completely.


Part C. Make the Snow Skin Mooncakes

8. Divide the prepared taro filling into 10 equal portions and form into balls.

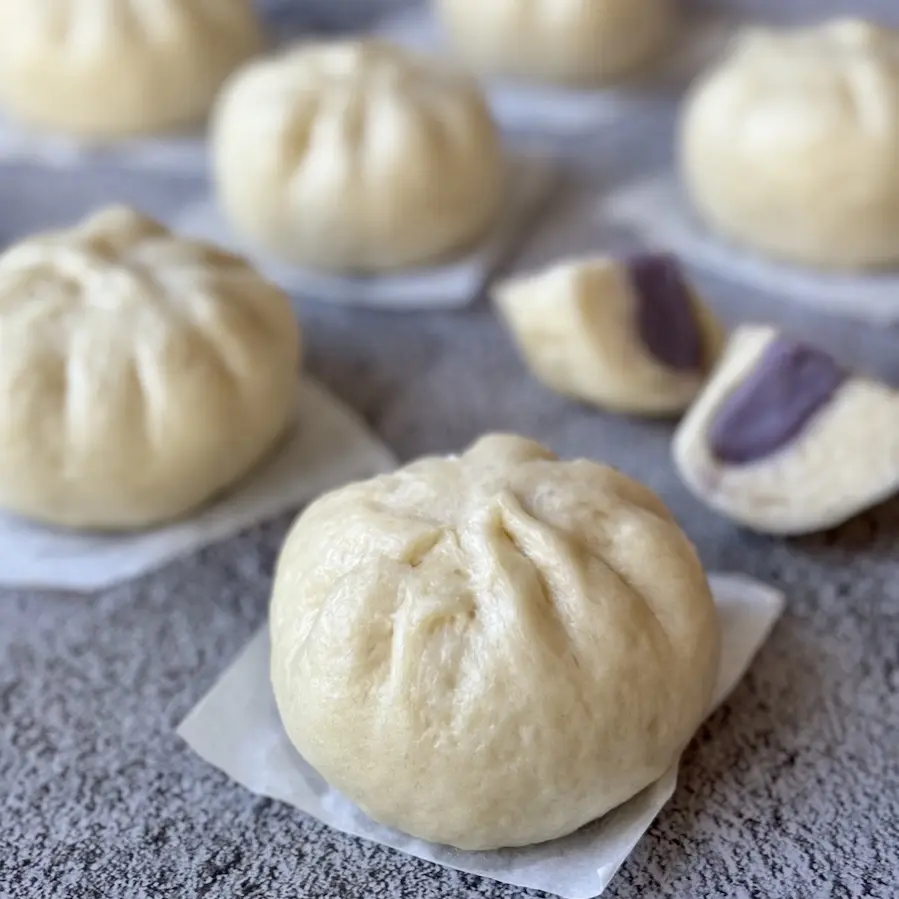
9. Grab one blue and white dough combo. Form into a ball and roll into a disc. Wrap the disc around a taro ball and seal completely. Shape using the mooncake mould. You can use a little cornflour if you’re finding the dough a little sticky.

These mooncakes are best enjoyed on the day they are made.

PS: If you don’t have mooncake moulds, you can just present these sweet treats as taro and coconut filled mochi balls! Go one step further if you want to unleash you inner creative skills … shape the mochi balls into cute figurines like bunnies, kittens, hedgehogs etc by using a small pair of pointed sharp scissors to snip in ears and spines.


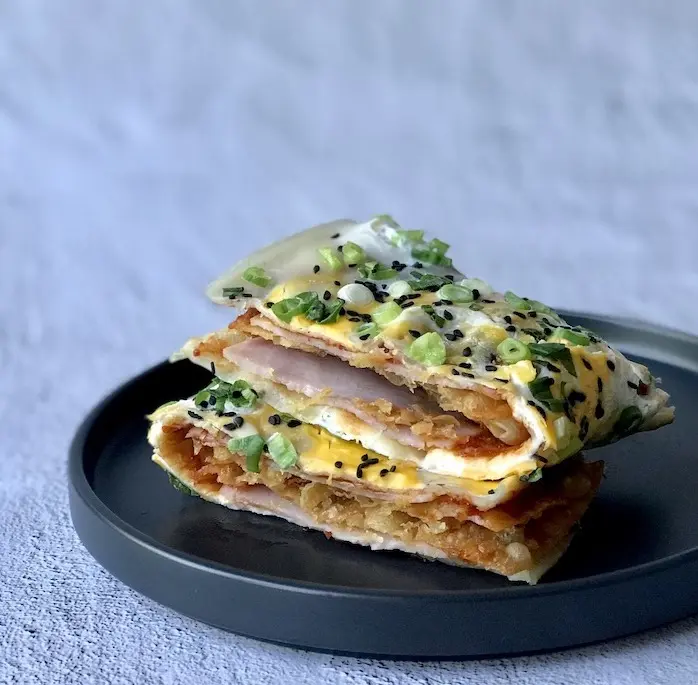
Jian Bing

Posted on 08 Aug, 2023
Jian Bing

1. Place all dry crepe ingredients into a med sized bowl. Whisk. Add in water and whisk to form a batter. A few lumps are ok. Add in oil and whisk to just combine.

2. Heat a non-stick pan and spoon in a ladle of batter, or just enough to coat the pan with a thin layer of batter. Keep the heat on low.

3. When the batter just turns opaque, crack an egg onto the crepe. Using a spoon, spread the egg to cover the crepe.

4. Sprinkle on spring onions and sesame seeds.

5. Flip the crepe over. Dollop on <1T hoisin sauce and <1T sambal oelek. Smear to cover the crepe with this sauce mix.

6. Place 2 slices of ham of choice down the centre of the crepe, leaving a gap in the middle to allow for a fold.

7. Place a crispy wonton wrapper on each piece of ham.

8. Fold one edge of the crepe in to cover. Fold the opposite parallel edge of the crepe in to cover. Now fold the crepe in half, along the gap you created between your ham/wonton wrappers.


9. Remove the crepe from the pan and slice in half. Enjoy 

San Choy Bow

Posted on 08 Aug, 2023
San Choy Bow

For the sauce:

1. Mix the cornflour and 1T water in jug/bowl until smooth. Add in remaining ingredients and mix until well combined. Set aside.

For the filling:

2. Heat oil in a wok or large skillet. Add garlic and ginger and saute until fragrant.

3. Add onion and saute for 2 minutes.

4. Add pork mince. Break it up in the pan and saute until there are no visible pink bits of meat.

5. Add in carrots, shiitake and water chestnuts. Saute until the carrots and pork have cooked through.

6. Pour in the sauce and stir through. Keep stirring to coat all the ingredients. Turn off the heat when the sauce has reduced and the filling is looking glossy. Season with pepper.

To serve:

7. Spoon filling into prepared lettuce cups. Top with chopped fresh chilli and sliced spring onions. Don’t skip the garnish. It contributes to the freshness and flavour of the overall dish.

Enjoy

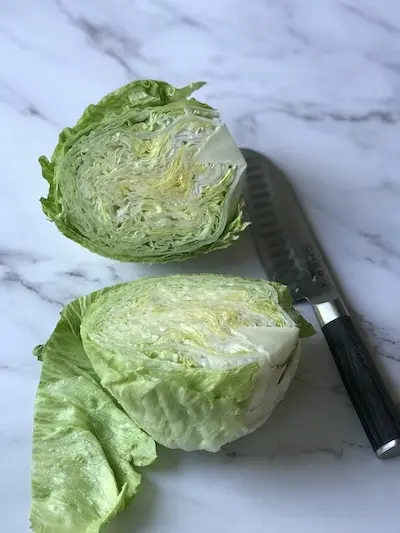
Lettuce Hack:

Just slice away enough of the core so that it barely holds the outer lettuce leaves together.

Make one slice through the centre of the entire head of lettuce (from the tip through to the centre of the core).

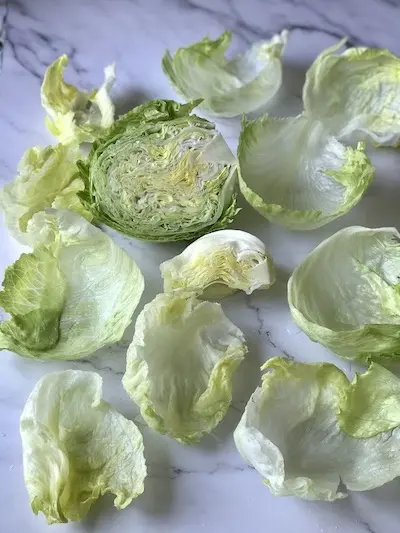
Now you can easily separate the lettuce leaves from each half and notice that the leaves are in the form of ready made cups.

Wash each lettuce cup and sit them in a big bowl of iced water. The water will help them stay crisp and keep their shape. After 10mins, remove the cups and gently shake dry/wipe dry with a clean tea towel. Viola. Never peel lettuce leaves the old way ever again.

Now to get on with making the filling for these lettuce cups …


Kimchi Mandu

Posted on 01 Aug, 2023
Kimchi Mandu

Make the Filling

1. Bring a medium pot of water to the boil.

2. Add the sweet potato noodles to the boiling water and cook for 7 mins. Drain and rinse through with cold tap water.

3. Using scissors, cut up noodles into manageable lengths.

4. In a medium sized mixing bowl, add the prepared noodles and all the other filling ingredients and mix through with a gloved hand.

5. Fill each dumpling wrapper with a small amount of filling. Fold the round wrapper in half to form a half moon shape. Press in the edges to seal (the more experienced you are, the more you can fill your wrapper to make a more plump dumpling).

6. Smear a small amount of water around the edges of half of the wrapper to help seal the dumpling.

7. Place dumplings on in steamer baskets lined with parchment paper. Make sure you space them apart and that they are not touching each other.

8. Steam for 8-15 minutes (depending on much you fill each dumpling).


Pan fried method

1. Heat some oil in a small pan over medium arrange 

2. Arrange 8 dumplings until the bottom turns light brown, about 2 to 3 minutes. 

3. Add 50 ml water to the pan and turn the heat to high. 

4. Cover the pan with its lid and let it steam. 

5. Turn the heat back to medium as soon as the water has completely evaporated. 


Make the Dipping Sauce

Combine all ingredients in a small mixing bowl and stir to dissolve the sugar.

Add spring onions, sesame seeds to chilli to taste.


Serve steamed/pan fried dumplings with dipping sauce.

Pork & Prawn Meatball Soup

Posted on 20 Jun, 2023
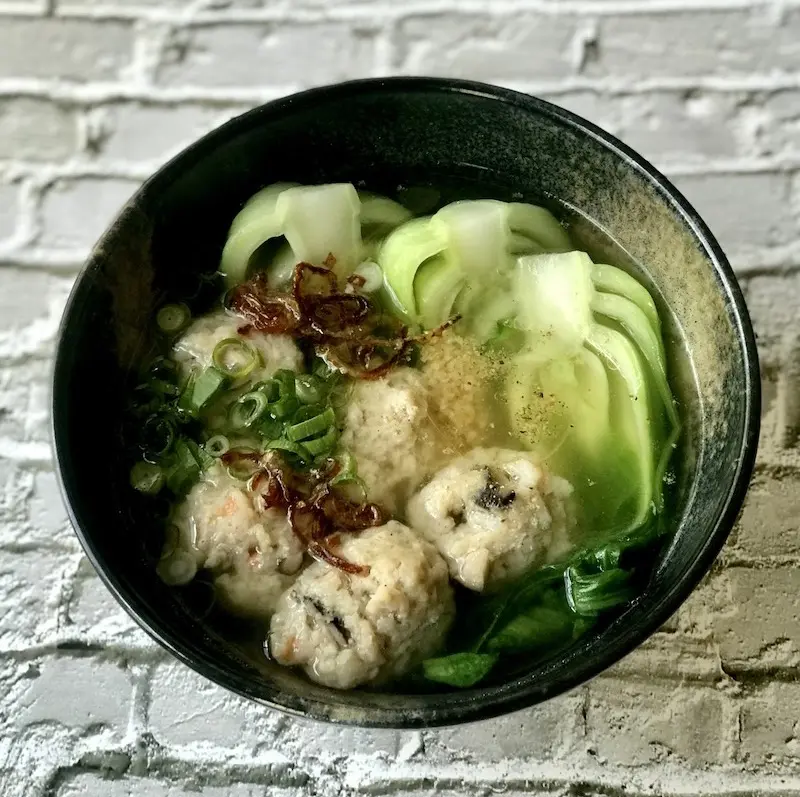
Pork & Prawn Meatball Soup
  1. Add all meatball ingredients into a stand mixer fitted with a paddle attachment and let it run on medium speed for about 5mins. This will give your meatballs stickiness and bounce. Alternatively, you can use a pair of chopsticks to stir vigorously in one direction until you notice the ingredients transform into a cohesive, sticky mix. Chill this mix for 30 mins.
  2. Meanwhile, add the water, soup cubes and coriander roots to a large pot and bring to the boil. Stir to dissolve the cubes.
  3. Once the soup is rapidly boiling, throw in bok choy and let them cook for about a minute (less if they are small). Remove the bok choy and place 4 x halves into each serving bowl.
  4. Form meatballs with your hands. I got 24 out of these. The yield will depend on the size of your meatballs (eg: the smaller the meatball, the more meatballs you will get). Gently add them to your pot of bubbling soup and cook for 8 mins.
  5. Remove meatballs and evenly distribute amongst the serving bowls. Ladle in remaining soup (discard coriander roots).
  6. Garnish with fresh coriander, sliced spring onions, fried shallots, cracked white. Serve hot.

Cha Gio (Vietnamese Spring Rolls)

Posted on 03 May, 2023
Cha Gio (Vietnamese Spring Rolls)

Makes 50 small rolls or 15-20 medium sized ones

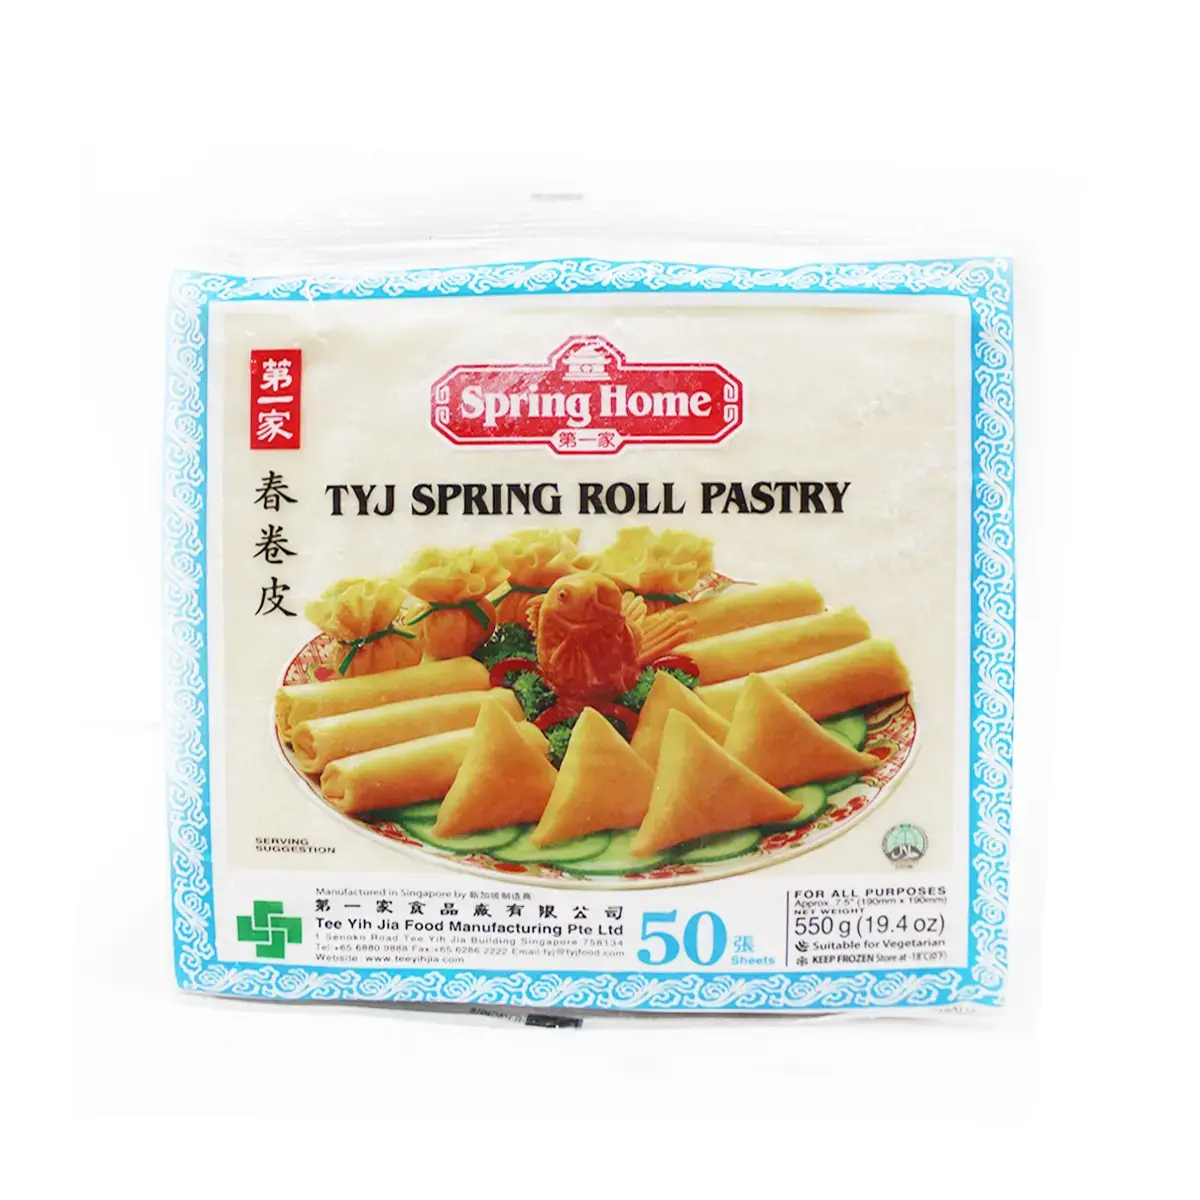
1. Thaw frozen wrappers in the fridge (in its wrapper, unopened). This will take a couple of hours.

2. Meanwhile, add noodles to one bowl, and dried mushrooms to another. Add boiling water to both bowls to fully cover. Leave to soak for 10mins then drain & rinse dry.

3. Slice noodles into shorter strands and finely chop mushrooms. Add both to a medium sized bowl, along with the rest of the filling ingredients. Mix thoroughly to combine.

4. Take wrappers out of its packaging & carefully separate each one by peeling them away from each other. Stack wrappers on top of each other and cover with a clean tea towel.

5. Prepare the slurry by mixing the flour and water together in a saucer.

6. Wrap your rolls with the prepared filling & secure the end with a dab of slurry.

7. Heat oil in a wok/pan and deep fry your rolls until golden. Drain on a wire rack lined with kitchen paper.

Serve these rolls with a side of nuoc mam dipping sauce.

(You can reheat cooked spring rolls in the oven or air fryer to bring back their crunch)

Crispy Prawn Balls

Posted on 07 Mar, 2023
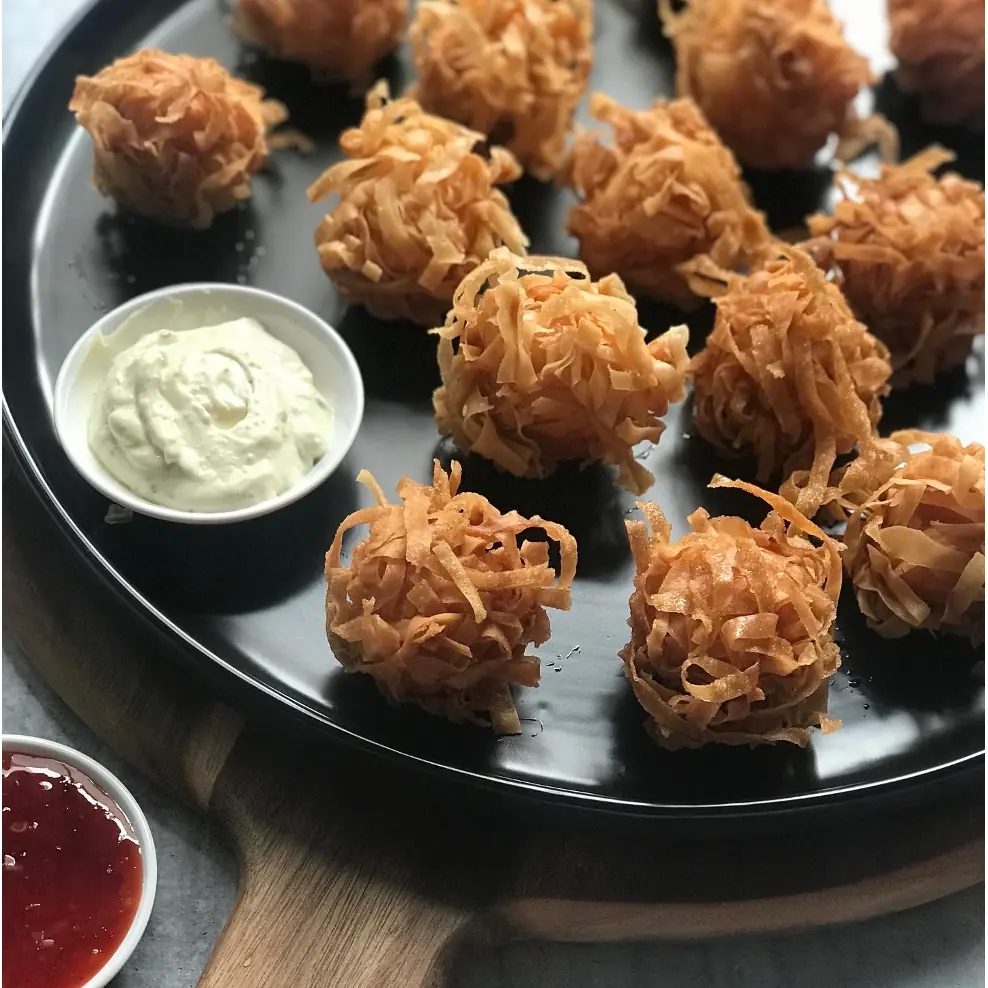
Crispy Prawn Balls

Makes approx 22 balls

1. Thaw out your spring roll wrappers and carefully separate into individual sheets. Using scissors, cut strips out of the sheets and separate into loose strips.

2. Blitz all the filling ingredients in a powerful food processor. You can have your balls chunky or blitz the mix longer for a sticky paste to get smooth and bouncy balls. Chill this filling mix for 30mins.

3. Take out your chilled filling and form into balls. This mix will yield about 22 balls.

4. Roll each ball into the strips of spring roll pastry to completely wrap each ball in pastry. Gently press in the pastry so that it sticks to the balls and trim off any long strands with scissors.

5. Heat up your oil to 180C and deep fry until golden. Drain on kitchen paper then serve hot with sweet chilli dipping sauce and/or yuzu mayo.

Chicken & Coriander Potstickers

Posted on 21 Feb, 2023
Chicken & Coriander Potstickers
  1. Start by adding all filling ingredients in a bowl and mix well to combine. Chill for 30mins.
  2. Make each dumpling by adding 1T of filling to the centre of a wrapper and form your dumpling. Repeat until all the filling is used up. Make sure your dumplings are placed on a clean, dry surface and that they are not touching each other.
  3. Prepare your slurry for the lace skirt by mixing the water, flours and vinegar in a bowl/jug.
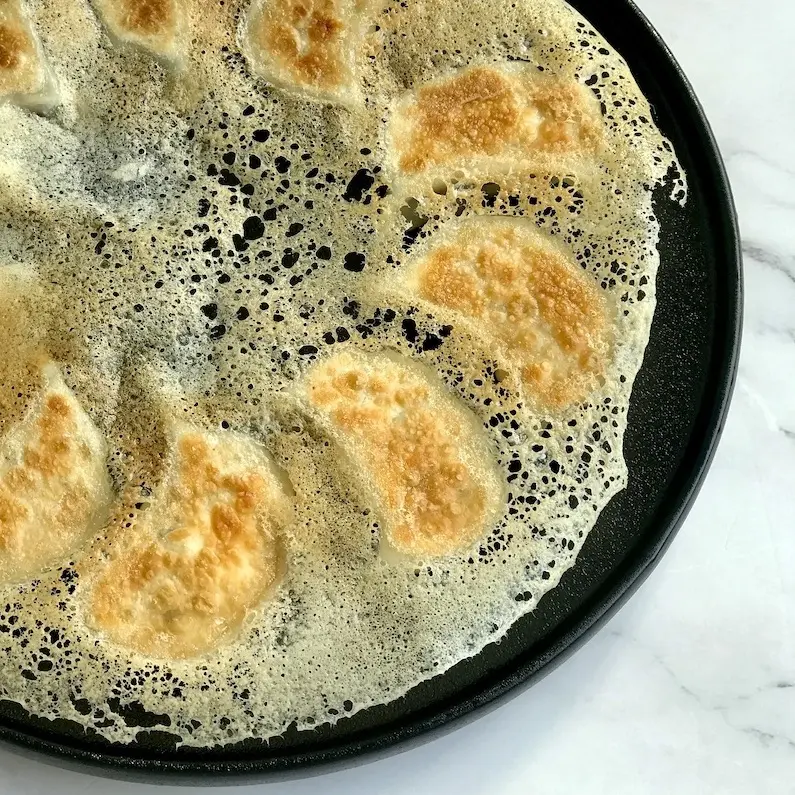
  4. To make one batch of dumplings, heat 1T of oil in your skillet. Add in 8-10 dumplings, making sure the dumpling bottom is sitting in the oil on the pan. When the bottoms start to brown, add in the slurry and cover with the lid. Allow the slurry to bubble in the pan. The steam created will cook your dumplings.
  5. Once the water has largely evaporated, uncover your pan and allow any remaining steam to escape to leave behind a dry, crispy, lace skirt at the bottom of the pan.
  6. Turn off the heat. Cover your dumplings with a large plate and invert your pot stickers in one action from the skillet to the plate.


Enjoy immediately. 

Quick Pandan Kaya Toast

Posted on 14 Feb, 2023
Quick Pandan Kaya Toast
  1. Scoop out the thick cream from the coconut cream container/tin and add to a small pot (leave behind the thin, watery liquid).
  2. Add in sugars, salt and a couple of drops of pandan flavouring (a little goes a long way). Gently and stir everything in the pot until all the sugar has dissolved. Turn off the heat.
  3. Place egg yolks in a medium sized bowl. Whisk to combine.
  4. Continue to whisk the egg yolks as you gradually add in the warm coconut cream mix.
  5. Add this egg and coconut cream mix back into the pot and gently heat. Continue stirring this mix with a spatula until it thickens (about 5-8mins) in the gentle heat.
  6. Toast some bread & spread your kaya jam over. Add a slab of butter as pictured. PURE INDULGENCE! 

Notes:

  • Your kaya will thicken further after it cools.
  • Allow your kaya to cool then spoon into a sterilised jar and chill before serving.
  • You can use real pandan leaves but we find using pandan flavouring saves so much time! 

Mango Pudding

Posted on 07 Feb, 2023
Mango Pudding

Makes 10-12

Prep: 20mins plus time overnight for setting

Cook: 10mins

Total Time: 30mins plus time overnight for setting

Make the mango puree:
1. Peel and cut up 4 ripe mangoes. Blitz the flesh in a food processor and transfer to a pot.

2. On medium heat, reduce the liquid until you end up with about 2 cups of puree. Be sure to stir constantly to avoid the liquid catching and burning in the pot.

3. Strain the puree through a fine sieve to give you a smooth puree. Set aside.
 

For the pudding, you will need:
1. Add gelatin to med-large sized heat-proof bowl. Pour in water and whisk to dissolve the gelatin.

2. Add in salt and caster sugar. Whisk to dissolve.

3. Pour in evaporated milk and mango puree. Stir until everything is well combined.
4. Using a fine sieve, strain the mix into a large heatproof jug. Fill glasses with pudding mix then add in diced mango to each cup.
5. Refrigerate overnight to set.
6. Pour evaporated milk onto your puddings just before serving.

Curry Corn Fritter

Posted on 31 Jan, 2023
Curry Corn Fritter

Serves 4-6 as a side


1. Mix all the ingredients together.

2. Pour oil into a deep fry pan, enough to coat the base with 1cm of oil.

3. When the oil is hot enough, dollop corn mix into rounds into the pan, leaving room between each fritter. Fry until the bottom is golden then flip. Continue to fry the other side until golden. Remove and drain on kitchen paper.

Serve immediately.